
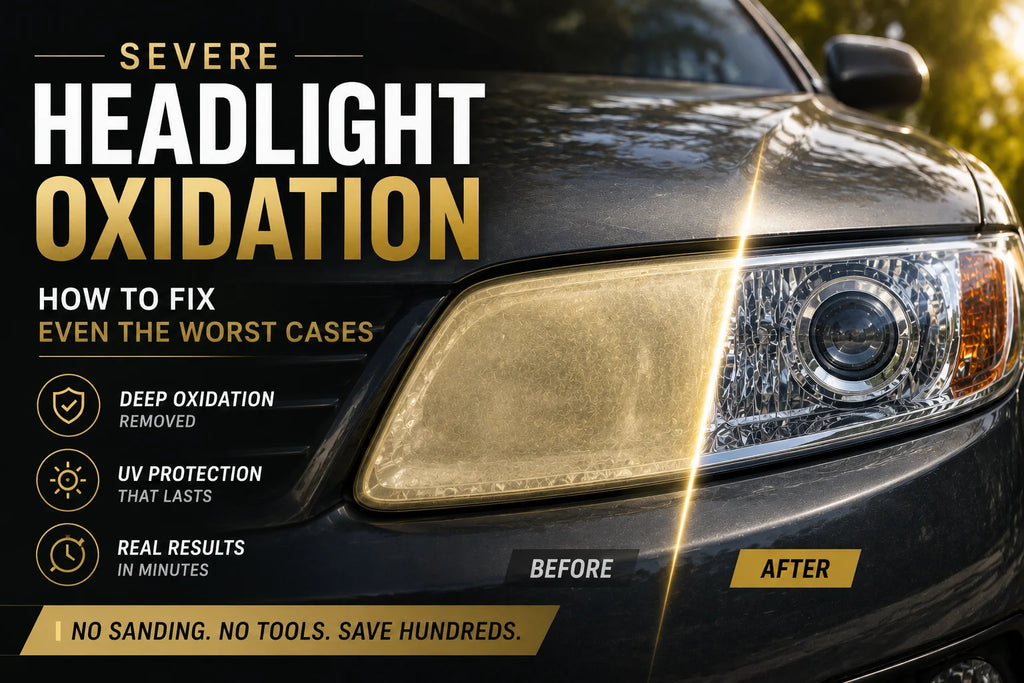
Severe Headlight Oxidation — How to Fix Even the Worst Cases
If your headlights have been foggy for years rather than months, you've probably assumed by now that restoration wipes are for lightly hazed lenses — not for headlights that look genuinely bad. Deep yellow, heavily frosted, maybe even a little rough or pitted to the touch.
The good news: severe oxidation responds to the same chemical process as light oxidation. It just takes a bit more work on the first step. The lenses that look the worst are often the ones where restoration makes the most dramatic, most satisfying difference — because there's more distance between where they start and where they end up.
This guide is specifically for that worst-case scenario: headlights that have gone untreated for many years and look like a lost cause. They're usually not.
Approaches to Severe Oxidation — At a Glance
Here's how the main restoration approaches stack up specifically for severe, long-neglected oxidation:
| Approach | Works on Severe Oxidation? | Sanding Needed? | Cost | Treatments Needed |
| Chemical wipe kit ★ (2 passes) | Yes — major improvement | No | Under $30 | 1–2 kits |
| Wet sanding + polish | Yes — most thorough | Yes, multi-grit | $20–$50 | 1, but risky |
| Drill-attachment kit | Yes — with effort | Abrasive pads | $25–$60 | 1–2 |
| Professional detailer | Yes | Their choice | $150–$300 | 1 |
| Full replacement | N/A — bypasses issue | N/A | $200–$800+ | N/A |
★ Even severely oxidized lenses respond well to a chemical wipe kit — usually with two applications of wipe one before sealing. No sanding, no scratch risk, and still a fraction of the cost of professional or replacement options.

What Makes Oxidation 'Severe' — And Why It Still Isn't Hopeless
Severe oxidation is what happens when a headlight lens has gone without any treatment for roughly eight to ten years or more, often on a vehicle parked outdoors in a sunny climate. At this stage, the lens isn't just yellow — it's often deeply frosted, sometimes with a slightly rough or granular texture, and in the most extreme cases showing faint surface pitting or crazing.
What's actually happening at this stage is more of the same process that causes light oxidation — just further along. The factory UV hardcoat degraded years ago, and the polycarbonate underneath has been directly exposed to UV radiation for an extended period, allowing the oxidized layer to build up thicker and rougher than it would after just a year or two.
The critical thing to understand is that this is still a surface condition. Severely oxidized polycarbonate is still, underneath that thick oxidized layer, largely intact structural material. The oxidation has simply had more time to develop. That means the same chemical removal process works — it just needs to work harder, and possibly more than once.
Severe oxidation is not a different problem from light oxidation. It's the same problem with more time behind it. The fix doesn't change — the amount of effort on step one does.
Before starting, it's worth confirming you're dealing with surface oxidation rather than a structural issue. Our guide on signs your headlights need restoration covers the touch test and other diagnostics that rule out cracked lenses or internal fogging.
What Result Can You Realistically Expect?
This is the most important expectation-setting section in this guide, and it's worth being completely honest about.
For severe oxidation, a single treatment typically produces a major, often dramatic improvement — the deep yellow clears substantially, the lens regains real transparency, and night visibility improves noticeably. It is common for this result alone to satisfy most people completely.
Whether the result reaches full 'like-new' optical clarity in one treatment depends on how deep the oxidation has gone. Lenses with heavy discolouration but a still-uniform surface (no visible pitting) very often do reach complete clarity in one thorough treatment, especially with two passes of wipe one. Lenses with actual surface pitting or crazing may see a fantastic improvement but retain a very slight residual haze in the deepest micro-pits after the first treatment — a second full treatment typically closes that remaining gap.
Either way, the improvement from a single treatment is substantial enough that it's very rarely a disappointing result — even in the true worst-case scenario.
To see what severe-stage restoration results genuinely look like, our before and after results guide includes real examples across every oxidation level, including heavily neglected lenses.
"These headlights hadn't been touched in probably 8 years. Genuinely bad — deep yellow, kind of gritty feeling. I did wipe one twice on each headlight before moving on because so much was still coming off after the first pass. End result was way better than I expected. Not flawless but honestly close, and the difference at night was massive."
— Robert A. 2007 Jeep Grand Cherokee, 8 years untreated
How to Restore Severely Oxidized Headlights — Step by Step
The process is the same three-step method used for any level of oxidation, with specific adjustments for severe cases at each stage.
Step 1 — Wash and Assess
Wash the lens thoroughly with clean water and let it dry completely. While it's drying, run a finger across the surface. Rough, gritty, but relatively uniform texture means chemical removal will work fully. Visible pitting, cratering, or crazing means you should expect to need two treatments for a complete result — but the process still applies.
Pro tip: Take a 'before' photo now. Severe oxidation cases produce the most dramatic transformations, and you'll want the comparison.
Step 2 — Remove the Oxidation — Wipe 1 (First Pass)
Apply the compound with firm, deliberate circular pressure across the full lens. On severely oxidized lenses, expect significantly more residue to transfer onto the cloth than you would on a lightly hazed lens — this is normal and a good sign that the compound is working. Cover the entire surface thoroughly.
Pro tip: Don't rush this pass. Severe cases benefit from taking real time here rather than moving quickly to compensate for how much needs to come off.
Step 3 — Remove the Oxidation — Wipe 1 (Second Pass, If Needed)
For genuinely severe cases, use a second application of wipe one focused on the areas that still show any haze or yellow tint after the first pass. Continue with the same firm circular technique. Most severe oxidation cases are fully cleared with one to two passes of this step — very rarely more.
Pro tip: If the cloth is still picking up noticeable residue on the second pass, that's fine — it means the process is still working. Continue until the cloth comes away essentially clean.
Step 4 — Prep and Seal — Wipes 2 and 3
Once the oxidation has been fully lifted, proceed exactly as with any restoration: wipe two removes residue and preps the surface, wipe three applies the UV protective seal across the full lens including edges. These steps don't change for severe cases — the surface just needs to be genuinely clean before the sealant goes on.
Pro tip: Because more material was removed in step one on a severe case, take extra care to fully cover the surface with the UV coat — this newly exposed polycarbonate needs complete protection.
This is the same process covered in our complete 3-wipe headlight restoration guide — severe cases simply repeat step one as needed before continuing.

When Even Severe Oxidation Isn't Enough — Knowing the Real Limit
To be fully honest: there is a point beyond which chemical restoration alone won't achieve full optical perfection, even with multiple treatments. This applies to a small minority of cases — typically lenses with deep, established crazing (fine cracks across the surface) or genuine pitting that has physically deformed the surface texture, not just discoloured it.
In these rare cases, the chemical method still produces a very real, worthwhile improvement — often transforming an opaque, barely-functional lens into one that's meaningfully clearer and noticeably better at night. It may just not reach the glass-like clarity possible on less severe cases. For genuinely extreme cases like this, some drivers choose to follow chemical treatment with light, careful sanding focused only on the worst micro-pitted areas, though this isn't necessary for the vast majority of even quite severe cases.
The honest takeaway: don't assume your headlights are in this small minority until you've actually tried the chemical method first. Most lenses that look 'too far gone' turn out to be firmly within what chemical restoration can fully handle.
If your lens turns out to have structural damage rather than just severe oxidation, our comparison of restoration versus replacement covers exactly when replacement becomes the right call instead.
Tips Specifically for Severe Cases
- Budget more time for wipe one — not because the process is different, but because thoroughness matters more here than anywhere else in the process
- Work in shade regardless of weather — severe cases have more compound-to-surface contact time needed, and heat causes premature drying
- Don't be alarmed by how much residue comes off — this is the oxidation actually leaving the lens, and more residue on a severe case is expected and normal
- Consider one kit per two severely oxidized headlights rather than expecting a single kit to comfortably stretch across four+ passes on both sides
- Take before and after photos — severe cases produce the most rewarding comparisons in the entire oxidation spectrum
|


Related Guides
→ 7 Signs Your Headlights Need Restoration
→ Headlight Restoration Before and After — Results at Every Stage
→ How to Restore Headlights Without Sanding
→ Headlight Restoration vs Replacement
→ How Long Does Headlight Restoration Last?
→ DIY Headlight Restoration: The Complete Guide (2026)
Frequently Asked Questions
Can severely oxidized headlights really be fixed without replacing them?
Yes, in the large majority of cases. Severe oxidation is still a surface condition — the polycarbonate underneath is generally intact. A chemical wipe kit, usually with two applications of the oxidation-removal step, produces a major to complete improvement. Replacement is only genuinely necessary if the lens is physically cracked or has deep structural pitting.
How many kits do I need for severely oxidized headlights?
One kit typically covers both headlights even with two passes of wipe one on each. If both headlights are genuinely severe, or you expect to need a second full treatment, having a second kit on hand is a reasonable precaution.
Will severely oxidized headlights ever look 'like new' again?
Very often, yes — especially if the surface is heavily discoloured but not physically pitted. Cases with genuine surface pitting or crazing may retain very slight residual haze even after multiple treatments, though the improvement is still dramatic and functionally significant. Most severe cases fall into the first category and do reach full clarity.
Is it worth trying restoration before assuming I need new headlights?
Almost always. A restoration kit costs under $30 and takes minutes, while replacement headlight assemblies cost $200 to $800 or more per side. Given how effectively even severe oxidation responds to chemical restoration, trying it first is the financially sensible step before considering replacement.
Does severe oxidation mean my headlights are unsafe to drive with right now?
Severely oxidized headlights do meaningfully reduce night visibility by scattering rather than projecting light, which is a genuine safety consideration. It's not an emergency requiring you to stop driving, but it is a good reason to prioritize restoration soon rather than continuing to defer it.
How is severe oxidation different from a broken headlight housing seal?
Severe oxidation appears as a rough, discoloured layer on the outer surface of the lens. Housing seal failure typically shows as visible moisture or fogging inside the headlight, behind the outer lens, especially noticeable after rain. If the outer surface feels rough or textured, it's oxidation and restoration will work. If moisture is visibly trapped inside the housing, that's a different issue requiring resealing or replacement.
The Bottom Line
Severely oxidized headlights look intimidating, and it's easy to assume they're beyond a simple fix — but the reality is that most of them respond very well to the same chemical restoration process used on lighter cases. The only real difference is that step one may need to be repeated once or twice to fully clear years of accumulated oxidation.
The results speak for themselves: drivers who've put off dealing with genuinely bad headlights for years are consistently surprised by how much a straightforward process that takes only a few minutes per side can achieve. Don't assume your headlights are the exception until you've actually tried it.
As always, prevention is easier than restoration — but even years of neglect rarely puts a headlight beyond saving.
The headlight cleaning and restoration wipes handle severe oxidation just as effectively as light haze — it simply takes an extra pass. Browse the full restoration collection or check the FAQ page for anything not covered here.
Don't assume it's too late.
Most 'hopeless' headlights aren't. See what a couple of extra minutes can do.
→ Shop the Headlight Restoration Kit