
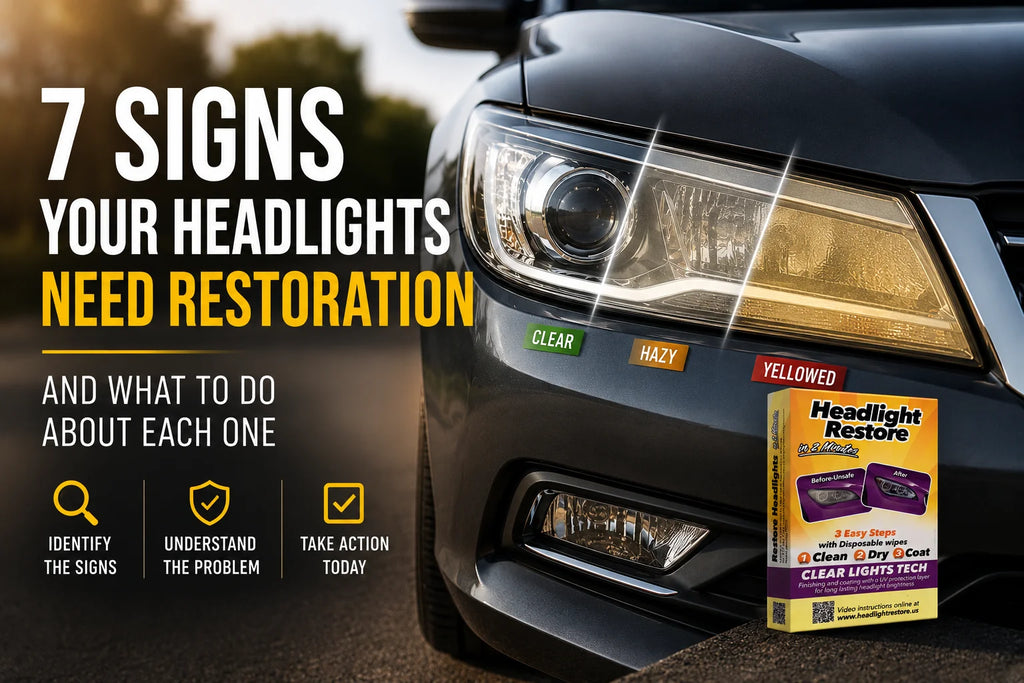
7 Signs Your Headlights Need Restoration — And What to Do About Each
Headlight oxidation is one of those problems that sneaks up on you. The change happens gradually enough that most drivers adjust to it without consciously noticing — until they see a freshly restored headlight next to theirs, or a passenger comments on how dim the headlights look at night.
By the time the problem is obvious, it has usually been building for a while. The good news is that every stage of headlight deterioration is treatable, and the earlier you catch it, the faster and more complete the result. A lens with slight haze takes minutes to fully restore. One that's been left for years takes the same process — just with a little more work on the first step.
This guide covers seven clear signs that your headlights need attention, what's actually happening at each stage, and exactly what to do about it.
At a Glance — Warning Signs and What They Mean
Here's a quick reference covering every sign discussed in this article. Urgency levels are colour-coded, and the action column highlights the fastest effective fix at each stage:
Warning Sign |
Urgency |
Action Needed |
Fix Time |
Slight haze / loss of gloss |
Low — act soon |
Full 3-step restoration (quick pass) |
2 min per headlight |
Visible yellowing |
Moderate |
Full 3-step restoration |
2 min per headlight |
Cloudy / frosted surface |
High |
Full 3-step restoration |
2–5 min per headlight |
Reduced night visibility |
High — safety |
Full 3-step restoration |
2–5 min per headlight |
Rough/gritty surface feel |
High |
Full 3-step restoration |
2–5 min per headlight |
Failed car inspection |
Urgent |
Full restoration immediately |
2–5 min per headlight |
Cracked or broken lens |
Replace only |
Replacement assembly needed |
Shop visit |
Note: The process is the same three steps at every stage. Highlighted in green is the earliest stage, where it's quickest and easiest — wipe one barely has to work.
 |
The 7 Signs Your Headlights Need Restoration
|
Sign 1 [ Low — Act Soon ] Your Headlights Have Lost Their Gloss This is the earliest and most easily missed sign. A new polycarbonate headlight lens has a clear, glossy appearance — similar to glass. As the UV hardcoat begins to degrade, the first change is a subtle loss of that gloss. The lens looks duller than it did, slightly flat or matte, but still mostly transparent. Most drivers notice this stage only when comparing their car to a newer vehicle or a freshly restored headlight. Run a clean finger across the lens — if it feels smooth but the lens appears noticeably less glossy than when the car was new, the hardcoat is beginning to wear. What to do: Run the full 3-step process now — before oxidation takes hold. Wipe one will have almost nothing to lift, wipe two preps the surface, and the fresh UV sealant reinforces the remaining hardcoat and significantly delays the yellowing timeline. This is the best possible time to intervene: the least work, the most prevention. |
|
Sign 2 [ Low to Moderate ] A Faint Yellow Tint or Haze is Visible The next stage is a visible but modest yellowing or haze — the lens is no longer optically clear but still transmits most of its light. This stage is often first noticed in photographs or when someone else comments on the car. In direct sunlight, the warm or milky tint is clearly visible. At night, the headlight beam may already be slightly less crisp than it should be, though the change is subtle enough that most drivers haven't consciously registered it. This is still early enough for a straightforward, complete restoration — and the result at this stage is typically the most dramatic before-and-after. What to do: A full 3-step restoration now produces a near-perfect result. The oxidized layer is still shallow, and the UV coat bonds cleanly to the freshly cleared surface. Don't wait. |
|
Sign 3 [ Moderate ] The Lens Looks Visibly Yellow and Cloudy By this stage the yellowing is obvious to anyone who looks at the car. The lens has gone from a warm tint to a clearly yellow or amber colour, and the cloudiness is pronounced — the lens no longer looks transparent but semi-opaque. The rough, porous surface causes visible light scatter, so the headlight beam appears diffuse and less directed than it should be. This is the most common stage at which drivers decide to act, and it's still very much within the range where a single full restoration produces an excellent result. The first wipe will transfer a substantial amount of yellow residue — that's the oxidation releasing from the surface. What to do: Full 3-step restoration. Wipe one may need a second pass on the heaviest areas. The result will be immediately obvious and the before-and-after contrast at this stage is usually very satisfying. |
To see exactly what signs two and three look like in real before-and-after photos — and what to expect from restoration at each level — see our headlight restoration before and after guide.
|
Sign 4 [ High — Safety ] Your Night Visibility Has Noticeably Dropped This is no longer just a cosmetic issue. An oxidized headlight lens doesn't just look cloudy — it physically redirects light away from where it's needed. The rough surface scatters the bulb's output in multiple directions instead of projecting it as a beam. The result is a headlight that appears to function (the bulb is on and emitting light) but that illuminates the road ahead far less effectively than it should. Drivers at this stage often describe needing to drive more slowly at night, having reduced confidence in visibility, or needing to use high beams in situations where dipped beams previously felt adequate. If you've noticed any of these, your headlights need restoration now — not eventually. What to do: Full 3-step restoration as soon as possible. Night visibility improvement after restoration is typically immediate and significant. This is a safety-relevant issue, not just cosmetic. |
|
"I hadn't realised how bad my night visibility had got until I restored the headlights and drove home the same evening. It felt like switching from a candle to a proper light. I should have done it months earlier — the difference was that significant." — Tom W. 2012 Jeep Cherokee |
|
Sign 5 [ High ] The Surface Feels Rough or Gritty When You Touch It Run a clean finger firmly across the headlight lens surface. A clear, protected lens should feel smooth — similar to glass. If the surface feels rough, gritty, or slightly sandpaper-like, the oxidized polycarbonate layer has developed real texture. This is a reliable indicator of moderate to significant oxidation, and it tells you that the degradation has progressed beyond just the hardcoat into the polycarbonate itself. Lenses at this stage benefit from firm, thorough application of the oxidation removal step — possibly with a second pass on the roughest areas — to ensure the full oxidized layer is lifted before the UV sealant is applied. What to do: Full 3-step restoration with extra attention on wipe one. Work until the cloth runs completely clean before moving to wipe two. The rougher the surface, the more important it is to be thorough at this stage. |
|
Sign 6 [ Urgent ] Your Car Has Failed or Is at Risk of Failing a Safety Inspection In many countries and states, headlight condition is assessed as part of vehicle safety or roadworthy inspections. Severely oxidized lenses that cannot project adequate illumination can result in a failure — and in some jurisdictions, driving with lenses below the required standard can result in a fine or defect notice even outside of inspection. If your headlights have been flagged on a previous inspection, or if you're due for an inspection and your lenses are visibly cloudy, restoration before the inspection is worth considering. A full restoration the night before a rebook has passed more inspections than it hasn't. What to do: Full 3-step restoration immediately — both headlights. Allow the UV coat to cure for several hours before the inspection for best results. The improvement in light projection from a restored lens is measurable and will be visible to an inspector. |
 |
|
Sign 7 [ Replace Only ] The Lens Is Cracked, Chipped, or Fogged from the Inside This sign is different from the others — it's the one that tells you restoration is not the answer. If the headlight lens has a visible crack or chip, or if the fogging appears to be coming from inside the housing rather than the outer surface, the issue is structural or involves a broken housing seal. In these cases, restoration will not help because the problem is not surface oxidation — it's physical damage or internal moisture ingress. Running a finger across an internally fogged lens will feel smooth on the outside because the outer surface is not the issue. Internal condensation, in particular, requires a new assembly because the seal between the lens and housing has failed. What to do: Restoration will not fix this. Contact a mechanic or auto parts supplier about replacement headlight assemblies. For everything else on this list, restoration works. |
|
The earlier you act on any of these signs, the faster and more complete the result. A lens with slight haze takes the same three steps as one that's been yellow for years — it's just significantly easier on wipe one. |
How to Check Your Headlights Right Now — 3 Quick Tests
You do not need to wait until a sign becomes obvious. These three tests take about thirty seconds and give you a clear picture of where your headlights are:
The touch test
Run a clean finger firmly across the full surface of the lens. Smooth means the hardcoat is still largely intact. Rough or gritty means oxidation has developed texture and the full restoration process is needed.
The gloss test
Stand to one side of the car in good daylight and look at the headlight lens at an angle. A healthy lens has a clear, glossy, almost reflective quality. A degrading lens looks duller, more matte, or slightly milky. If the lens looks noticeably flat compared to the rest of the car's finish, the hardcoat is starting to go.
One extra clue worth checking: if your headlights look temporarily clear right after rain or a wash but turn hazy again once they dry, that's a classic oxidation signature. Our guide on why headlights look clear when wet but hazy when dry walks through why this happens and what it confirms.
The night test
Drive on a familiar road at night and pay attention to how far your headlights actually illuminate the road. If you find yourself relying on high beams more than usual, or if oncoming drivers seem to have noticeably brighter beams than yours without using high beams, your headlight output has likely been reduced by oxidation.
For the full explanation of what's happening inside the lens at each of these stages, our article on why headlights turn yellow covers the UV degradation mechanism in detail.
What Happens If You Leave It Too Long
Each stage of oxidation is more work to reverse than the one before. A lens at sign one — just losing its gloss — needs only a quick pass on wipe one before prep and sealant. A lens at sign three needs the same three steps but produces a complete result in a single treatment. A lens at sign five with rough texture may need two passes of wipe one to fully lift the oxidation before the UV coat can bond properly.
The fundamental limit is physical: if the polycarbonate surface is allowed to develop deep pitting or crazing over many years of neglect, restoration becomes increasingly difficult to complete fully in a single treatment. The process still works, but multiple applications are needed and the result may not be a perfect ten.
There is no stage on this list where restoration stops being worth trying — but there is a clear progression from easier to harder. Acting at sign one or two is dramatically simpler than acting at sign four or five.
If your headlights are still at sign one or two, our guide on how to protect headlights from UV damage covers the prevention methods that can delay the progression significantly.
|


Related Guides
→ Why Headlights Turn Yellow — The Science Behind UV Oxidation
→ How to Restore Oxidized Headlights at Home — Full Guide
→ How to Restore Yellow Headlights at Home — Step-by-Step
→ Headlight Restoration Before and After — Results at Every Stage
→ How to Protect Headlights from UV Damage
→ DIY Headlight Restoration: The Complete Guide (2026)
Frequently Asked Questions
How do I know if my headlights need restoration or replacement? |
The key test is the touch test: run a finger across the outer surface of the lens. If the yellowing or cloudiness feels rough or gritty, it's on the outer surface and restoration will work. If the lens surface feels smooth but the fogging or discolouration appears to be inside the housing, or if the lens is physically cracked or chipped, restoration won't help and replacement is needed. Surface oxidation of any severity responds to the 3-step restoration process. |
Can I restore headlights myself at any of these stages? |
Yes. All seven signs except the last one — cracked lens or internal fogging — are treatable with a DIY restoration kit. The process is the same regardless of the oxidation stage: three steps in order. The main difference between stages is the amount of work required on wipe one to fully lift the oxidation before moving to the UV sealant. More severe oxidation needs more time and pressure on the first step. |
What is the earliest sign of headlight oxidation? |
The earliest noticeable sign is a loss of the lens's original gloss — the headlight looks slightly duller or flatter than it used to, without visible yellowing yet. This is the easiest stage to treat: the same 3-step process as any other stage, but wipe one has almost nothing to remove, so the whole job takes about two minutes per headlight and the fresh UV sealant delays the yellowing timeline significantly. |
How do I know if my reduced night visibility is from headlight oxidation or bulb issues? |
The simplest test is visual inspection in daylight: if the lens is visibly yellow, cloudy, or has lost its gloss, oxidation is a likely contributor to reduced night output. If the lens appears clear but one headlight seems dimmer than the other, the issue is more likely a failing bulb. Both headlights yellowing and losing output together is almost always oxidation rather than a coincidental dual bulb failure. |
Is it worth restoring headlights that are very badly oxidized? |
Yes — even heavily oxidized lenses show significant improvement from the restoration process. The result from a first treatment may not be a perfect ten on a lens that has been untreated for many years, but it will be meaningfully better for both appearance and night visibility. A second full treatment typically completes the result. The cost and time investment of restoration is negligible compared to the improvement. |
Can a restored headlight fail a safety inspection again quickly? |
Not if the UV sealant is applied correctly as the final step. Without UV protection, re-oxidation starts immediately and a lens could deteriorate back to a problematic state within weeks in high-UV conditions. With the UV sealant coat applied and a simple maintenance routine, the restored clarity should hold for several months — well beyond a typical inspection interval. |
The Bottom Line
Headlight deterioration follows a predictable pattern — and every stage of it is easier to deal with than the one that follows. The earliest sign, a loss of gloss, can be addressed in about two minutes per headlight with the same three steps — wipe one barely has to work at that stage. By the time the lens is visibly cloudy and affecting night visibility, wipe one has real oxidation to lift — but it still takes about two minutes per headlight and produces a result that lasts months.
The most important thing this guide can tell you is not to wait. Oxidation progresses slowly enough that it's easy to put off — and quickly enough that lenses that look borderline this year can be significantly worse by next year. Catching it early means less work, better results, and clear headlights that stay clear with simple periodic maintenance.
As always, prevention is easier than restoration — but whenever you're ready to act, the 3-step process works at every stage.
The headlight cleaning and restoration wipes address every stage from sign one through sign six. Browse the full restoration collection or visit our FAQ page for guidance before ordering.
|
Whatever stage your headlights are at — the fix starts here. Prevention is always easier than restoration. But restoration works too. |