
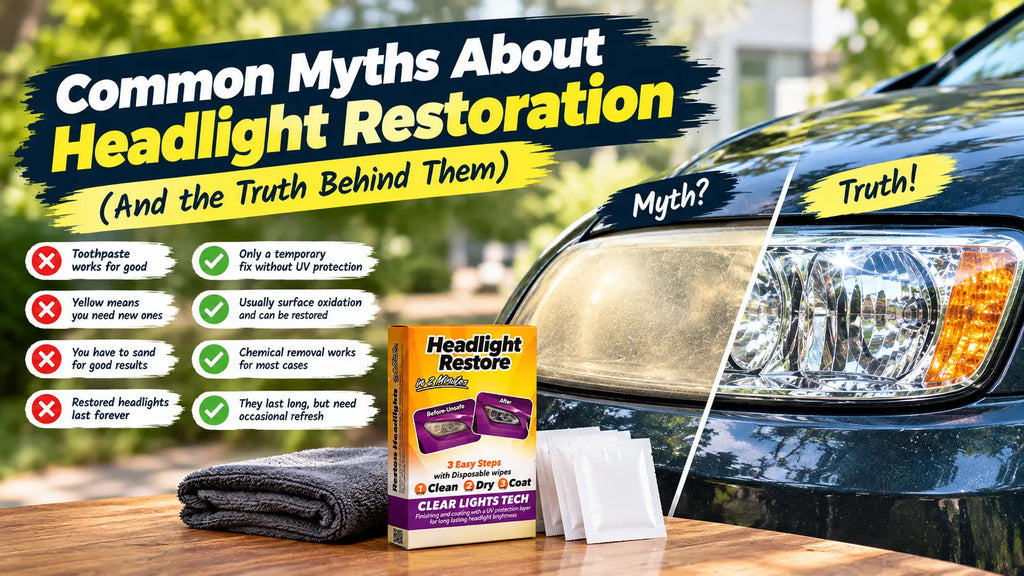
8 Headlight Restoration Myths (And the Truth Behind Them)
If you have ever searched for how to fix cloudy headlights, you have probably run into a lot of confident advice that does not hold up. Some of it is harmless. Some of it quietly wastes your time and money. Here are the most common myths about headlight restoration, and what is actually true.
Why These Myths Stick Around
Most headlight myths survive because they seem to work at first. A lens that looks clearer for a few days feels like proof that the method succeeded, and by the time the haze returns, the connection is rarely made. Add the fact that oxidation builds slowly, and it becomes easy to blame the car, the weather, or the product instead of the missing step. Knowing what is really happening to the lens makes these claims much easier to spot.
Myth 1: Toothpaste Fixes Headlights for Good
Toothpaste is a mild abrasive, so it really does scrub off a thin layer of the hazy surface. That is why the lens looks better for a short while. The problem is that nothing protects the freshly exposed plastic afterward, so UV light starts the same damage again right away. Most people see the haze return within a few weeks. We covered this in detail in Does Toothpaste Really Restore Headlights?.

Myth 2: Yellow Headlights Mean You Need New Ones
This is the most expensive myth on the list. Yellowing and haze are almost always a problem on the outer surface of the lens, where the factory coating has worn away and the plastic underneath has oxidized. The lens itself is usually fine. Replacement only makes sense for cracks, chips, or moisture trapped inside the housing. If you are weighing the two options, our guide to restoration versus replacement lays out the cost and the decision points.
Myth 3: Restoration Is Only Cosmetic
It is easy to assume that clearer headlights simply look nicer. In reality, an oxidized lens scatters light instead of focusing it into a clean beam, which reduces how much light actually reaches the road. Restoring the lens improves how well you can see at night, not just how the car looks from the outside.
Myth 4: All Restoration Products Work the Same
They do not, and the difference usually comes down to one step. A product that only cleans or polishes can make the lens look clear on day one, but if it does not finish with a UV protective sealant, the oxidation comes back quickly. A complete process has three parts: remove the oxidized layer, prep the surface, and seal it. If a product skips the sealing step, expect short-lived results. See the difference between a basic cleaner and a true restoration kit for more on this.
Myth 5: You Have to Sand Headlights to Get Professional Results
Sanding works, but it is far from the only route. It removes material from the lens, takes real skill to do evenly, and still needs a UV sealant afterward or it fades like everything else. For light to moderate oxidation, which covers most cars, a chemical wipe process removes the damaged layer without any abrasion. Sanding is mainly worth considering for deep pitting on lenses that have been neglected for many years.
Myth 6: Once Restored, Headlights Stay Clear Forever
A proper restoration lasts several months, but it is not permanent. The sealant protects the lens, and like any protective coating it gradually wears under sun exposure. How quickly depends on climate and where the car is parked. When the gloss starts to fade, repeat the full 3-step process. There is no sealant-only shortcut, because the sealant needs a freshly cleaned and prepared surface to bond to. For realistic timelines, read How Long Does Headlight Restoration Last?.

Myth 7: A Good Wash Will Remove the Yellowing
Washing removes dirt, bugs, and road film. It cannot remove oxidation, because oxidation is not sitting on top of the lens. It is the surface of the lens itself that has degraded. A useful test is to wash the headlight thoroughly. If it is still yellow or hazy afterward, you are dealing with oxidation rather than dirt.
Myth 8: Restoration Fixes Moisture Inside the Headlight
Not every foggy headlight is oxidized. If the haze appears to sit behind the lens, looks worse after rain, or shows small water droplets inside, moisture has likely gotten in through a failed seal. A restoration kit only treats the outer surface, so it cannot fix that. The housing needs to be dried and resealed, or replaced if it is cracked. Checking which problem you have first saves you from buying a product that cannot help.
Myth vs. Reality at a Glance
| The myth | The reality |
|---|---|
| Toothpaste fixes headlights for good | It helps briefly, but with no UV protection the haze returns in weeks |
| Yellow headlights need replacing | Usually surface oxidation, which can be restored |
| Restoration is only cosmetic | Clear lenses project light properly and improve night visibility |
| All products work the same | Results depend on whether the process includes UV sealing |
| You must sand for good results | Chemical removal handles most cases without abrasion |
| Restored lenses last forever | Results last several months; when they fade, repeat the full 3-step process |
| Washing removes yellowing | Washing removes dirt, not oxidation |
| Restoration fixes moisture inside the lens | It only treats the outer surface, so internal fogging needs a reseal |
What Actually Works
Once the myths are out of the way, the approach is simple. It is a complete three-step process that can be done at home with no special tools, in about 2 minutes per headlight:
- Remove the oxidized layer with firm, even pressure until the cloth comes away clean.
- Prep the surface so the sealant can bond properly.
- Seal the lens with a UV protective coat, which is what keeps the result from fading.
Before you start, wash the lens so you know whether you are dealing with dirt or oxidation.
If you want to try it yourself, the headlight restoration kit includes all three steps, and one kit covers both headlights. Our walkthrough on how to restore oxidized headlights at home covers the technique step by step. Work in the shade if you can, since heat makes the compounds dry too quickly.
For the full picture, from causes to costs to maintenance, start with our DIY Headlight Restoration: The Complete Guide. If your first attempt did not last, Why DIY Headlight Restoration Fails explains the usual culprits.
|

Frequently Asked Questions
Can I trust home remedies for cloudy headlights?
They can give a brief improvement, but most skip UV protection, so the haze returns quickly. They are best treated as a temporary fix at most.
How do I know if my headlights are oxidized or just dirty?
Wash them with soap and water. If they are still yellow, hazy, or rough to the touch afterward, the cause is oxidation.
Is restoring headlights worth it compared with replacing them?
In most cases, yes. Surface oxidation can be restored for a fraction of the cost of new assemblies. Replacement is only necessary for cracks or internal moisture.
Do I need special tools for headlight restoration?
No. A wipe-based kit is designed to be used by hand with no sanding equipment or power tools.
How often should I redo my headlights?
Results typically last several months, depending on climate and parking conditions. When the lens starts to lose its gloss, repeat the full 3-step process. There is no sealant-only shortcut.