I Tested Headlight Restoration on One Side First — Here's What I Saw
I'll be honest — I wasn't sold right away. The idea that three wipes could do what years of foggy driving hadn't fixed seemed too clean, too simple. So before committing to both headlights, I did what any reasonable skeptic would do: I tried it on just one side first.
That decision turned out to be the best thing I could have done — not because it saved me time, but because the moment I walked around and saw both headlights side by side, one crystal clear and one still yellowed and cloudy, every question I had disappeared. The difference wasn't subtle. It was immediate, obvious, and honestly a little embarrassing that I'd been driving like that.
This is that story — and a full breakdown of how the process works, why the results last, and what most people get wrong when they try to fix oxidized headlights on their own.

The One-Headlight Test — What Actually Happened
I started on the driver's side. The lens was visibly cloudy — that dull, yellowed film you stop noticing after a while because it happens so gradually. Three wipes, maybe ninety seconds of actual work.
Wipe one lifted a surprising amount of residue off the lens — you could see it on the cloth, which is weirdly satisfying in the way that deep cleaning anything is satisfying. Wipe two cleaned the surface down to bare polycarbonate. Wipe three went on smooth and left the lens looking like it came off a showroom car.
Then I walked around to compare.
One side clear. One side yellow. Same car. Same age. Same exposure. The only difference was three wipes.
That side-by-side view is something you can't unsee. It makes the before state look worse than you remembered it, because now you have something to compare it to. I did the second headlight immediately. Total time for both: just over two minutes.
Why Do Headlights Get Cloudy in the First Place?
Understanding why headlights oxidize makes it easier to understand why the fix works — and why some fixes don't last.
Modern headlight lenses are made from polycarbonate plastic rather than glass. Polycarbonate is lighter and more impact-resistant, but it's vulnerable to UV radiation. From the day a car is manufactured, sunlight is slowly degrading the outer hardcoat layer that protects the lens. Over months and years, that degradation becomes visible: the lens turns yellow, then cloudy, then rough to the touch.
This is called oxidation — and it happens entirely on the surface of the lens. The polycarbonate underneath is usually still in good condition. You don't need to replace the headlight. You just need to remove the oxidized layer and reseal the surface before it oxidizes again.
That's the entire logic of the 3-wipe method.
How the 3-Wipe Method Works — Step by Step
The process is straightforward. Each wipe does a specific job, and skipping any one of them is why most DIY attempts don't last more than a few weeks.
Wipe 1 — Remove the Oxidation
The first wipe contains a compound that chemically dissolves and lifts the oxidized layer from the polycarbonate surface. Work in circular motions across the full lens. You'll see the yellow residue transferring onto the cloth in real time — that's the oxidation releasing. Keep going until the cloth comes away clean. The lens will look dramatically clearer after this step alone, which is where a lot of people stop. Don't stop here.
Wipe 2 — Clean and Prep the Surface
The second wipe removes compound residue and surface contaminants, leaving the polycarbonate chemically neutral and ready to accept the sealant. This step is about adhesion. If the UV sealant in wipe 3 goes onto a surface that still has compound residue, it can't bond properly — and it will wear off in days rather than months. This is the step most people skip, and it's the main reason DIY results often disappoint.
Wipe 3 — Seal with UV Protection
The third wipe applies a UV-blocking protective coat to the clean lens surface. This does two things: it restores the glossy, optically clear appearance of the lens, and it seals the polycarbonate against the UV radiation that caused the oxidation in the first place. This is the step that makes the results last months rather than weeks. Without it, you've cleaned the lens but left it completely unprotected — the yellowing will return quickly.
Why Other DIY Methods Don't Last
If you've tried toothpaste, baking soda paste, or a generic polish on cloudy headlights before and been disappointed by how quickly the results faded, there's a specific reason: none of those methods include a UV sealant.
Removing the oxidation is only half the job. Polycarbonate that's been stripped of its degraded outer layer is raw and completely exposed to UV radiation. Without a protective coat applied immediately after cleaning, the UV damage starts again from day one — and the lens will re-oxidize within weeks, sometimes faster.
The 3-wipe system works as a complete process. The compound removes, the prep wipe cleans, and the UV coat protects. It's the same approach professional detailers use — because it's the only approach that actually produces lasting results.
What Surprised Me Most About the Results
A few things I didn't fully expect:
- How much residue came off on the first wipe. I knew the headlights were foggy, but seeing the yellowy film actually transfer onto the cloth made the problem feel more real — and the solution more satisfying.
- How fast it was. I'd mentally prepared for a project. It wasn't. Ninety seconds per headlight, maybe a little more if you're careful around the edges.
- How clear the lens looked after wipe three. Not 'better than before' clear — optically clear, like new. The kind of clear where you check if there's still a lens there.
- How the side-by-side comparison made the untreated headlight look worse than I'd ever noticed it before. Once you have something to compare it to, there's no going back.
The second headlight took the same amount of time as the first. I just moved faster because I already knew what I was doing.
How Long Do the Results Last?
With the UV sealant applied correctly, results typically last several months under normal driving conditions. The exact duration depends on how much UV exposure your vehicle gets — cars parked outdoors in sunny climates will need a maintenance coat sooner than those kept in a garage or driven in overcast regions.
When the lens starts to look slightly less clear after several months, you usually don't need to repeat the full three-step process. A single application of wipe three — the UV sealant — is typically enough to restore the clarity and reset the protection.
Compare that to toothpaste or generic polish methods, which often fade within two to four weeks because there's no UV protection layer involved. The difference in durability comes entirely from that final step.
What You Actually Need
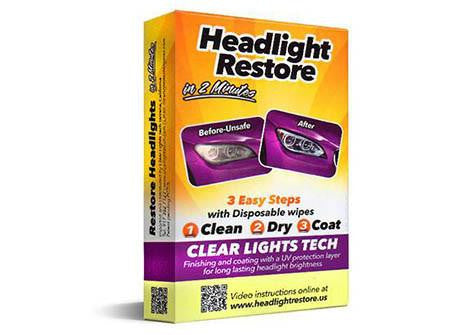
The complete kit contains everything for both headlights — no additional tools, no sanding, no mechanical skill required:
- Oxidation removal compound wipe (Wipe 1)
- Surface prep and cleaning wipe (Wipe 2)
- UV protective sealant wipe (Wipe 3)
One kit does both headlights with enough product left for a maintenance coat months later. The process requires nothing else — no buffing machine, no sandpaper, no protective gloves or specialist products.
The headlight cleaning and restoration wipes are the same three-step system described in this article. If you want to do what I did and start with just one headlight to see for yourself, one kit is more than enough.
See the difference for yourself —
one headlight, three wipes, two minutes.

Frequently Asked Questions
| Can I really do just one headlight first to test it? |
| Yes — and honestly, it's a good idea. Testing on one side first lets you see the before and after side by side, which is far more convincing than any description. One kit has plenty of product for both headlights and a follow-up maintenance coat, so nothing is wasted. |
| What if the results fade after a few weeks? |
| Fading quickly almost always means the UV sealant wasn't applied or didn't bond properly. Make sure wipe two fully cleans the surface before applying wipe three — any compound residue left on the lens will prevent the sealant from adhering correctly. Follow the three steps in order and the results will last significantly longer. |
| Do I need to sand my headlights first? |
| No. For light to moderate oxidation — which covers the vast majority of cases — the chemical wipe method removes the oxidized layer without any sanding. Sanding is an aggressive approach that removes material from the lens itself and risks permanent scratching if done incorrectly. The 3-wipe system achieves the same result without that risk. |
| How long does the whole process take? |
| Under two minutes per headlight. Three wipes, each taking around twenty to thirty seconds. Both headlights done in the time it would take to find a detailer's phone number. |
| Will this work on severely oxidized headlights? |
| The 3-wipe method handles light to moderate oxidation effectively. For very severe, deeply pitted lenses that have gone untreated for many years, multiple applications of wipe one may be needed before the surface is clear enough for wipe two and three. In extreme cases — where the lens surface itself is physically pitted or cracked — replacement may be the only option. |
| Is the UV coat really necessary? |
| Yes. It's the single most important step for lasting results. Without UV protection, cleaned polycarbonate is fully exposed to sunlight and re-oxidizes quickly — often within a few weeks. The sealant is what separates a restoration that lasts months from one that lasts days. |
The Bottom Line
I started skeptical enough that I only wanted to commit to one headlight. The side-by-side result — thirty seconds after finishing wipe three — removed every reservation I had. The second headlight took the same ninety seconds as the first.
If you're on the fence, do what I did. Start with one side. Walk around and look. The difference between a cloudy, yellowed headlight and a restored one is not subtle, and you'll understand immediately why the UV coat on the final step matters — because the lens you just cleared looks exactly how the other one used to before you stopped noticing.
Three wipes. Two minutes. Both headlights. The headlight cleaning and restoration wipes include everything you need to try it for yourself.
See the difference for yourself —
one headlight, three wipes, two minutes.