First-Time Headlight Restoration Results — 'Look How Clear It Looks'
Hi, I'm Jessica — and I'll be upfront: I had never done anything like this before.
I'm not a car person. I don't do detailing. I don't have a kit of polishes and applicators sitting in my garage. When my headlights started looking foggy and yellowed, I just kind of accepted it as a thing that happens to cars and moved on.
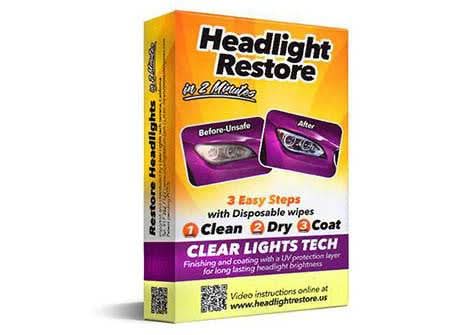
Then I came across these headlight restoration wipes, and something about the simplicity of it made me think — okay, even I can do this. Three wipes. That's it. No sanding, no machines, no YouTube tutorial rabbit hole.
So I tried it. Right there in the driveway, with absolutely no experience, on a car whose headlights I had genuinely stopped noticing were that bad. And the result — the clarity of that lens after wipe three — was the kind of thing you want to immediately show someone standing nearby.
I held the product up next to the headlight and just looked at it. The difference was immediate. How had I been driving with lenses that looked like that?

Why I Finally Decided to Do Something About My Headlights
It crept up on me. That's how headlight oxidation works — it happens slowly enough that you adjust to it. The lenses go from clear to slightly hazy to visibly yellow, and at each stage your brain just recalibrates to a new normal.
What finally made me notice was seeing a car the same age as mine with headlights that looked genuinely new. Clear, glossy, sharp. And I thought — mine don't look like that anymore. When did that happen?
I looked into it properly for the first time. The fogginess is called oxidation — UV radiation breaking down the outer layer of the polycarbonate lens over time. It's not permanent damage. It's a surface condition, which means it can be treated without replacing the headlight assembly.
Once I understood that, I started looking for the right way to fix it. A lot of options came up — sanding kits, toothpaste, generic polish. The more I read, the more it became clear that most of those methods either took too long, required too much experience, or didn't actually last. The 3-wipe system kept coming up as the method that worked because it addressed all three stages: removal, prep, and UV protection. That's when I ordered the wipes.

What It's Like to Do This for the First Time
I want to be specific here because I think it helps people who are in the same position I was — curious but a little uncertain about whether they can actually do this.
The answer is yes. You can absolutely do this. Here's what the experience is actually like as a first-timer:
Wipe 1 — Removing the Oxidation (This Is the Satisfying Part)
I started on the passenger side headlight and worked in small circular motions the way the instructions said. Within maybe fifteen seconds I could see yellow residue transferring onto the wipe. That was the oxidized layer literally lifting off the lens. It's one of those moments where you can visibly see the problem leaving, and it's genuinely satisfying in a way I didn't expect. I kept going until the wipe came away clean. The lens was already noticeably clearer — but I knew from what I'd read that stopping here is the mistake most people make.
Wipe 2 — Cleaning the Surface (The Step That Makes It Last)
The second wipe removes whatever residue the first one left behind and prepares the polycarbonate for the sealant. This one felt more like a cleanup step — less dramatic than wipe one, but I now understand it's critical. If any compound residue stays on the lens, the UV coat in wipe three can't bond to the surface properly, and the results wear off quickly. Thirty seconds, full coverage, done.
Wipe 3 — The UV Coat (Where the Clarity Comes From)
This is the one that made me stop and look. After wipe three went on and I stepped back, the lens had a clarity to it that I honestly hadn't expected. Glossy, sharp, optically clear — the kind of clear that makes the rest of the car look slightly underdressed by comparison. This coat is also what seals the polycarbonate against UV radiation so the oxidation doesn't just come straight back. Without it, you've cleaned the lens but left it fully exposed to the same sun damage that caused the problem in the first place.
Three wipes. I timed it. Just under two minutes for one headlight. I immediately did the other one.

The Actual Result — What 'Look How Clear It Looks' Means
I know 'look how clear it looks' sounds like something you'd say in an ad. But it was genuinely my first reaction, standing in my driveway, holding up the empty wipe next to a headlight that no longer looked like it belonged on a car that had been left in a field.
The clarity isn't subtle. It's not 'a bit better.' The lens goes from cloudy and yellowed to optically transparent — the same quality as a new headlight. If you've been living with foggy headlights long enough to stop noticing them, the moment you see the result is the moment you realize how bad they had gotten.
And it's not just cosmetic. Clear headlights project more light forward. Oxidized lenses scatter light in all directions, which reduces how far your beam actually reaches at night. After restoring both headlights, my night driving felt noticeably better — brighter, more directed, more confident. That's not a placebo. That's physics.
Who This Is Actually For
I want to answer this directly because I think a lot of people assume headlight restoration is a 'car person' thing. It isn't. Here's who this genuinely works for:
- Anyone with cloudy, yellowed, or foggy headlights — regardless of how long they've been that way
- People with no detailing experience or tools — nothing extra is required
- Anyone who's tried toothpaste or generic polish and been disappointed by how quickly the results faded
- People who were quoted $150–$300 by a detailer for something they can now do themselves in two minutes
- First-timers — the process is three steps in order, and the instructions are on the wipes
The only scenario where this doesn't fully work is if your headlight lenses are cracked, physically damaged, or so severely oxidized from years of neglect that the surface is deeply pitted. In those cases, the wipes will still improve the lens, but the results may not be as dramatic as a lens with light to moderate oxidation. For most cars — including mine — the results are exactly what you see.
How Long Do the Results Actually Last?
This was my first question after seeing how good the result looked. The answer depends on the UV sealant — wipe three — and how much sun exposure your car gets.
With the coat applied correctly, the results typically last several months. The polycarbonate is sealed against UV radiation, which means the oxidation can't restart quickly. If you park outdoors in a sunny climate, you may notice slight dulling sooner than someone who parks in a garage — but even then, you're talking months, not weeks.
When the lens does start to look less clear over time, you usually don't need to repeat the full three-step process. A single application of wipe three — the UV sealant alone — is typically enough to restore the clarity and reset the protection. One kit covers both headlights with enough product left for a follow-up coat.
What You Need — Nothing Else
This is the complete list:
- The headlight cleaning and restoration wipes (includes all three wipes)
- A car with oxidized, cloudy, or yellow headlight lenses
- Two minutes
No sandpaper. No polishing machine. No detailing knowledge. No appointment. The wipes come with everything you need, and the process is self-explanatory once you have them in your hand.
I used the headlight cleaning and restoration wipes — the same kit linked throughout this post. One kit covered both headlights and I still have product left for a maintenance coat in a few months.
See what Jessica saw —
crystal clear headlights in minutes, no experience needed.
→ Get the Headlight Cleaning & Restoration Wipes
Frequently Asked Questions
| Do I need any experience to use these wipes? |
| No. I had zero detailing experience and zero familiarity with headlight restoration before trying this. The process is three steps in a specific order — the instructions are on the packaging and the wipes are labelled. If you can wipe down a surface, you can do this. |
| What if my headlights are really badly oxidized? |
| The wipes work best on light to moderate oxidation, which covers most vehicles. For lenses that are severely pitted or haven't been treated in many years, the first wipe may need to be repeated to fully lift the oxidized layer before moving to wipe two and three. The results are still significant — just allow a little more time on wipe one. |
| Why does the UV coat matter so much? |
| Without the UV sealant, cleaned polycarbonate is completely exposed to sunlight. UV radiation is what caused the oxidation in the first place — so leaving the lens unprotected means it starts re-oxidizing immediately. The UV coat in wipe three seals the surface and prevents this, which is why the results last months rather than days. |
| How is this different from using toothpaste? |
| Toothpaste is a mild abrasive — it scrubs the surface without removing oxidation chemically, and it contains no UV protection. Any improvement from toothpaste fades quickly because the lens is left raw and unprotected. The 3-wipe system chemically dissolves the oxidized layer, preps the surface for bonding, and seals it with UV protection. The process is more complete, which is why the results last significantly longer. |
| Will it work on my specific car? |
| The wipes work on polycarbonate headlight lenses, which is standard on virtually all vehicles manufactured after the mid-1990s. If your car is from that era or newer and has cloudy, foggy, or yellow lenses, the product will work. It does not restore glass lenses (found on older classic vehicles) or physically cracked lenses. |
| Can I just do the restoration myself without watching a tutorial? |
| Yes — and I did exactly that. The process is straightforward enough that no video tutorial is necessary. Wipe one removes, wipe two preps, wipe three seals. Work across the full surface of the lens for each step and you'll get the result. |
My Honest Verdict
I came into this with low expectations and no experience. I left with two clear headlights and the kind of mild embarrassment that comes from realising you've been driving around with foggy lenses for longer than you should have.
The process took less time than I spent reading about it. The result was better than I expected. And the fact that the UV coat means I won't have to think about this again for several months makes the whole thing feel even more worthwhile.
If you've been putting this off because it seemed complicated, or because you assumed you needed more knowledge or more tools — you don't. Three wipes. That's really it.
The headlight cleaning and restoration wipes are what I used. Same product, same result you'll get. I'll be back to do the maintenance coat in a few months — but for now, I'm just enjoying how good the car looks from the front.
See what Jessica saw —
crystal clear headlights in minutes, no experience needed.
→ Get the Headlight Cleaning & Restoration Wipes