It’s the weekend! your friends have called for an evening trip to the town beach or some exotic resort and you decided to make a grand entrance with your FJR-1300 or your favorite bike. You gear up on your Cordura fabric leather jacket, roar your motorcycle engine only to realize that your headlight is discolored from oxidation. Now, you are wondering; how do I restore my motorcycle headlights? Or how do I remove Headlight oxidation? If you have ever found yourself in such a situation or you have a bike whose headlight looks cloudy, this article is for you! As you read, you will learn how to restore motorcycle headlights, simple DIY tricks on how to fix foggy headlights, clean hazy Headlights, and remove oxidation to restore your motorcycle Headlights.
Headlights are, without doubt, our extra pair of eyes that illuminate far onto the road to show us obstacles, potholes, and the way the road curves as we drive along at night. Still, they are prone to oxidation due to constant exposure to ultraviolet rays, rain, abrasion, caustic chemicals, and road debris impact. At this point, they become a source of grave danger.
When oxidation clogs a motorcycle’s Headlight, it dims the light and makes it almost impossible for the rider to see in the dark. Sometimes, it can make the headlight look hazy as though there is a gas buildup inside the headlight housing. Other times, it gives the Headlight lens a yellowish discolored appearance.
However the effect oxidation might have on your motorcycle Headlights, overlooking it without attempting to defog and restore it to its original look can be dangerous. Over time, the headlights lenses may develop a surface crack, a condition called crazing. Trust me, crazing is not what you need on a weekend reunion or hangouts with your fellow bikers, friends, and colleagues.
That is why you need to restore your headlights as soon as they become foggy. After all, how do we keep the shiny side up if our ride isn’t shiny? Restoring your motorcycle headlights to what they were before would mean that you remove oxidation, fix the foggy headlight, and clean the plastic lens covering the light bulb. Believe me, it does seem easier than it sounds. With the simple DIY tricks below, you can clean your sealed glass Headlight and restore your motorcycle Headlight to its original beam.
How to clean motorcycle headlight with home DIY
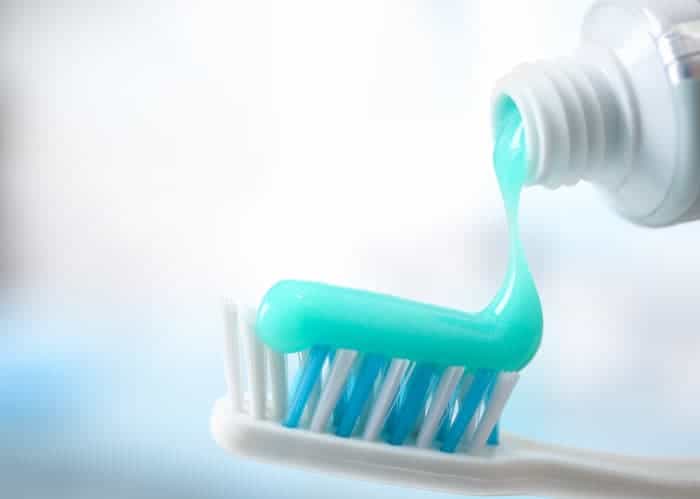
Household materials like toothpaste and baking soda can be used to clean motorcycle headlight, remove oxidation, and restore the polycarbonate plastic lens to its original appearance. Gritty toothpaste contains abrasive elements that when gently applied to a plastic surface; can easily wear away layers of scrapes and scratches on any headlight casing.
Toothpaste method
To use this method, get an abrasive toothpaste and use a clean cotton towel or toothbrush to apply the toothpaste to the headlight lens. Do not put too much, but just a fingertip amount and rub all around the headlights in a circular motion. But before doing this, you must have wet the motorcycle headlight and done preliminary cleaning with automotive soap and water.
For an effective result, you may need to scrub a bit harder for the fogginess to clear off. Whether you own a motorcycle or you’ve been searching for how to polish your car headlights, applying the above DIY toothpaste method may be the answer to your headlight restoration and even turn out to be the only DIY motorcycle lens restorer you need.
How to restore motorcycle headlights with restoration kit
Polishing a motorcycle headlight may go beyond the conventional method of washing the motorcycle lens with an automotive soap and scrubbing with toothpaste. Sometimes, what you need is an Ultimate durable fix that restores and coats your headlight housing with a solution against sunray without you buying an additional protective film.
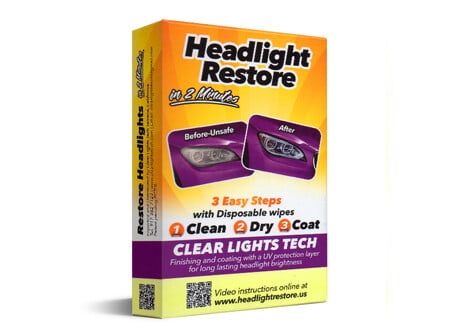
If that sounds like the kind of fix you need then a restoration kit like Clear Lights Technology is for you! Voted one of the best selling restoration kits on Amazon due to its convenient and easy three-way method of usage, the CLT headlight restoration kit is packed with three items infused with a powerful solution that removes yellowing and foggy build-ups without damaging your plastic lens surface.
How to restore motorcycle headlight with clear light technology (CLT)

How to restore motorcycle headlight with headlight restoration kit
no tool required
Total Time: 3 minutes
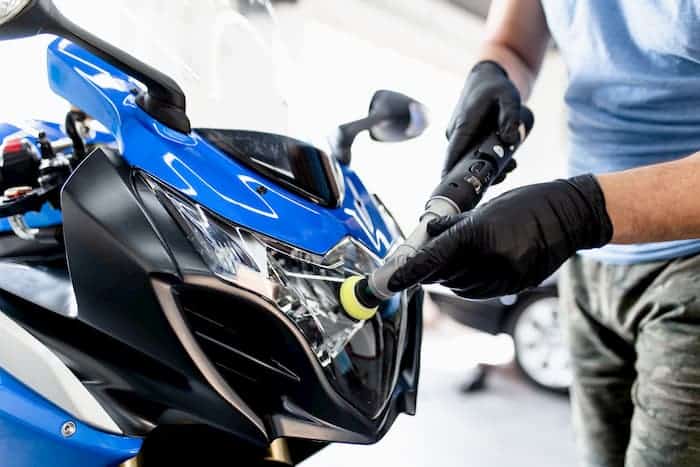
Step 1: Deep Cleaning
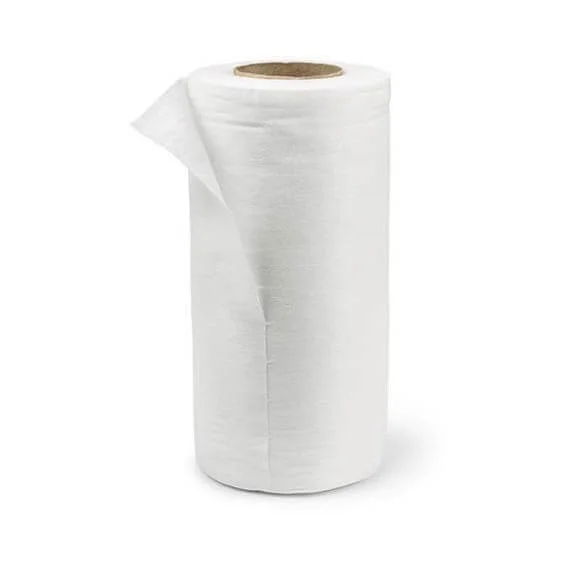
The first step is to ensure that your motorcycle headlight is cool before starting the cleaning process. If they’re still warm, you can rub them with a cool, damp microfiber cloth or use a spray bottle with a microfiber towel. After opening the first pack of the cleaning kit, use the wipe in a circular motion to clean the headlamp and apply a clear coat. CLT’s solutions are all in the wipes, so you won’t need any additional rubbing compound, wool pads, or restoration discs.
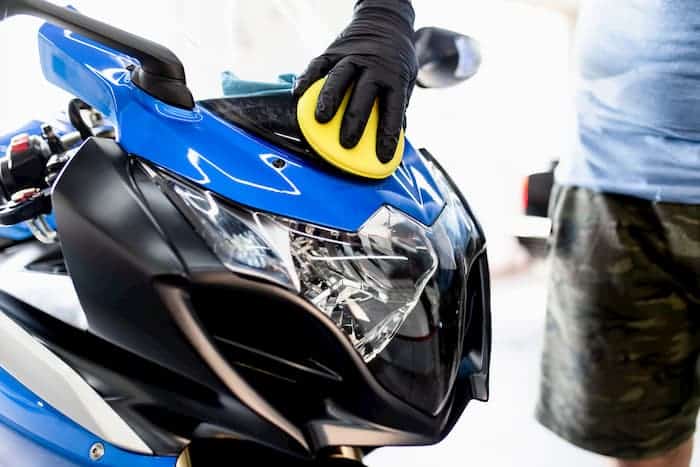
Step 2: Dry Thoroughly
Once your motorcycle plastic headlight appears clean, you can dry it with a towel and repeat the process as many times as needed until you are satisfied with the view of your motorcycle headlight. Now, ensure your bike’s Headlight is dried thoroughly before continuing to the final step.
Step 3: Protect
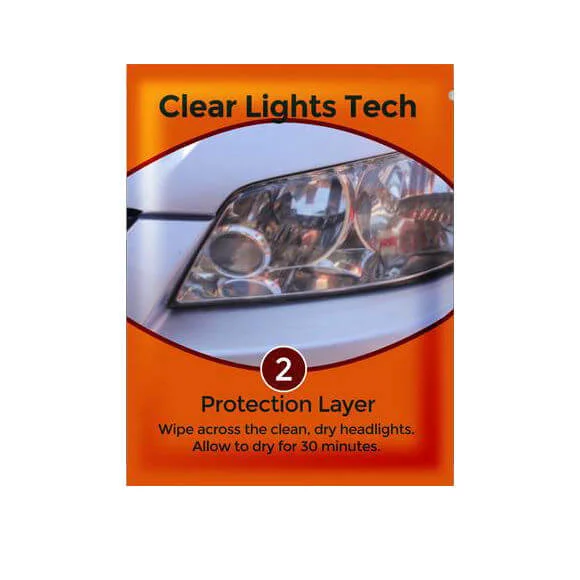
Open the second pack of the kit, and remove the wipe without unfolding it. The fine polish of this wipe reduces haziness in your motorcycle plastic lens and yields great results while applying a protectant to your headlamps.
Supply:
- Buy headlight restoration kit
Tools:
- Headlight restoration kit
- towel
Materials: Water
Final thoughts
Here are some useful tips when you decide to use a headlight restoration kit.
- Always ensure to follow the manufacturer’s instructions to the letter, there is no need to improvise.
- Don’t rush the process, oxidation does not happen overnight, so getting rid of oxidation and foggy motorcycle headlight may take a few more minutes than you envisaged, don’t be hasty, be patient.
- A DIY restoration kit like clear light tech doesn’t require sanding. So, you need to wipe thoroughly as the manual suggests.
- Be very careful when applying your headlight restoration kit. Most kits require that you tape around the edges of your car headlights to avoid spoiling your car paint job.
- Always wet the headlight surface before wiping and using the kit’s solution.
- Trust the kit and the instructions and guidelines.