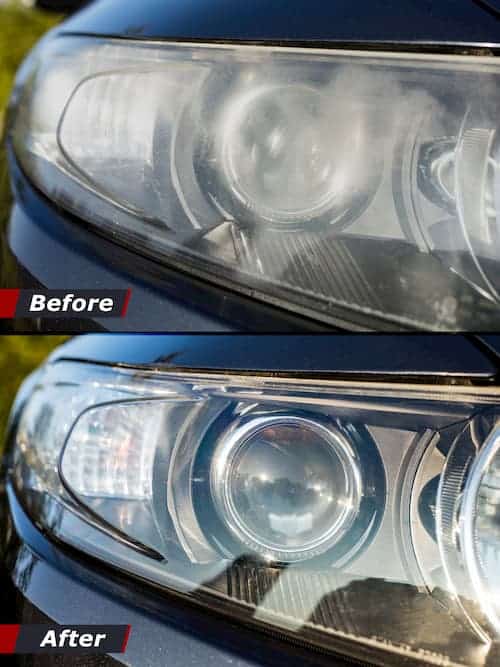
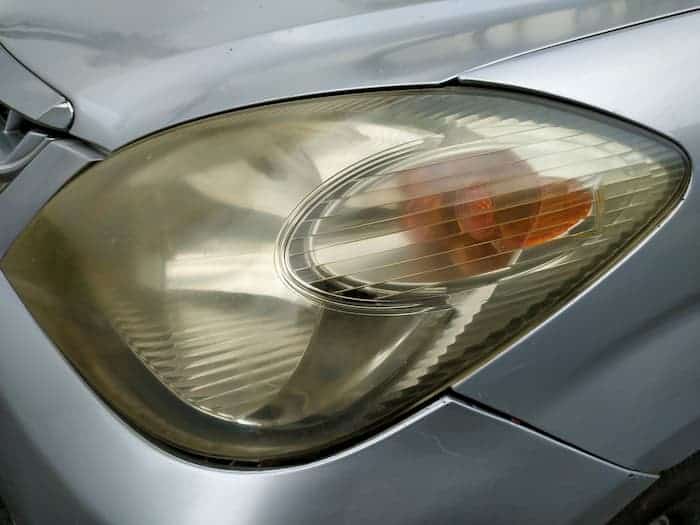
Don’t you hate it when your car headlights get that discolored, awful yellowish appearance? If you do, then that’s a reason why you should learn how to clean oxidized headlights! For every car enthusiast, there is nothing more worrisome than looking at a discolored headlight. Immediately, your mind roams to how best to clean your oxidized headlights.
Headlights are arguably the most important feature in a car, and as such, it is the most important outer part to clean in a car. When you drive at night, you do not want to have foggy headlights that restrict the road’s clarity.
With headlight discoloration posing a challenge to drivers, a lot of questions flood the mind of motorists. Questions like; what causes headlights to become foggy? How to clean oxidized headlights? What is the best and most effective method to clean oxidized headlights? If you truly love your car, you have come to the right place to learn how to clean oxidized headlights. So, read on!
What is the cause of oxidation?

Usually, headlights come with a protective coat to shield them from harmful external factors like Sunlight and UV lights. So, even though headlights come with UV protection, it eventually fades away after being exposed to grits, sun rays, and harsh weather. This reaction is called oxidation.
It is the constant exposure to weather hazard, heat, and grits your headlights face while you drive that gives it the undesirable yellow color you see on it from time to time. This is also the reason why motorists need to clean oxidized headlights to give it that flashy and sparkling beam.
Effects of headlamp oxidation

As earlier mentioned, oxidation occurs as a result of exposure to UV lights and this is what calls for urgent headlight restoration. However, the question remains, what exactly are the effects of headlamp oxidation and how does it affect the driver, car owner, and other motorists?
The average lifespan of a car is up to eleven years on the road and as such, there is every likelihood of wear and tear or ‘’aging’’. Oxidation of the headlights is an eventuality and could cause safety risks on the road if not restored on time.
When the headlights become foggy and yellowish, it may lead to ‘’loss of vision’’ or dimness. You do not want to be driving a car at night with foggy headlights, the brightness of your headlamps are tampered with and so this restricts what you see.
Also, there is another risk to other motorists on the road, the brighter your headlights, the sooner you may be seen on the road while driving, especially at night. With foggy or oxidized headlamps, your vehicle may be seen too late to make a move or swerve off your path if it’s in a street or close.
The best way to deal with this is to remove oxidation before it’s too late. We are looking at a potential threat to life and your car may become a ticking time bomb if you do not take action. This brings us to how exactly we can deal with this oxidation and feel safer.
Headlight restoration is a delicate step to take! You have to be careful which method you choose to go with, what chemicals or liquids to use, and how best to clean the headlights that won’t bring up temporary results.
There are several ways to restore your headlight and get rid of that pesky oxidization. We have compiled a list of the most common and the most effective methods to help you make a more informed decision depending on your preference.
How to remove oxidation from headlights?
As aforementioned, there are several ways to remove oxidation from headlights. There are DIY methods that require the use of everyday tools and substances. This section would explore those methods so you can do it yourself and as a plus, we would also explore some more advanced and professional methods.
DIY methods of headlight Restoration

When it comes to headlight restoration, if you are doing it yourself, it is important to be careful in following the right steps, lest you cause permanent damage. To begin, the first step is to wash the lens with automotive soap. When you do this, you have a clean surface to work on. Then you can then apply your DIY tools and substances that would be mentioned below:
- Baking soda paste: it goes without saying that to use this method of getting clean oxidized headlights, you will need to make a baking soda paste yourself. To do this, start by mixing five tablespoons of baking soda with water, enough to form a paste. Then, apply very liberally to the headlights using a sponge. Clean in a slow but deliberate circular motion after which you can then rinse the headlights to see the results.
- Toothpaste: You can also use toothpaste! Apply toothpaste into a dry cloth and scrub the lens of the headlights, after a few minutes, rinse and see the results
- Vinegar: This is another useful substance that will work as a great headlight cleaner, first you have to remove the lens and soak it in vinegar for up to an hour. Then, use a rough sponge to remove whatever grime may remain on the lens. After this, you can reattach the lens and you should see great results.
The above are some of the best DIY methods to remove oxidation from headlamps and these everyday tools have the potential to provide surprising results as headlight cleaners, you also can use it for clean tail lights.
Other more advanced methods:
After UV lights defog your headlights, leaving it over time may cause a more difficult fogginess or yellowish stain so there may be a need to up the ante and use a more professional and thorough method. Here are some that you could go with
- Sanding: this involves using sand to scrub the lens to remove the oxidized outer layer of the headlights.
- Polishing: there are special polishes that remove dirt and scratches on the headlights that cause dimness.
- Sealing: you could as well seal the headlights with a high-quality clear coat to slow down the process of future oxidization.
5 reasons why your headlights still look foggy after cleaning the outside lens
- Car Detailing with Toothpaste
If you choose to clean the outside lens of your car headlights with toothpaste, chances are they will still look foggy because toothpaste is not an abrasive manufactured for car headlights.
- Simple Car Wax
Most detailing shops when cleaning the outside of your headlight lens would only polish, run a buffer over the lenses, and coat with simple wax. This offers minimum protection and would get your headlights looking foggy again.
- Car Cleaning with Only Automotive Soap
If you intend to restore your car headlight and you only clean the outside lens with automotive soap, then it would definitely look foggy once your car is dry.
- Consistent Exposure to Sun Rays
Do you always park your car outside rather than the garage? If yes, it can be one of the reasons when your car still looks foggy. Constantly parking your car under the sun exposes your headlights to Sun Rays which causes it to oxidize and look foggy.
- Wrong Restoration Kit
During your car detailing, applying the right restoration kit is very important. Without a specialized restoration kit like clear light tech, your car can still look foggy after the headlight lenses must have been cleaned.
A more thorough method to go for would be procuring a restoration kit. With just one kit, you could combat oxidation of headlights and have that amazing result you wish for in your headlamp. There are several methods as we have seen, but a restoration kit is one of the best methods when it comes to headlight restoration.