It is against the US Headlight Law to not have your headlight on when visibility is seriously reduced. To avoid getting a ticket, we recommend you regularly check them, especially before embarking on a night-time trip or during bad weather conditions. To diagnose your car headlights, you can have someone operate the switches while you walk around the car to inspect each light. Side and taillights, headlamps (main and dipped beams), direction indicators, stop lights, and a rear licence plate light are all required to be functional for your car to be road worthy. So, how do you test the headlight bulbs with a battery? Suppose they’ve refused to come on.
Before testing your car bulbs, you need to make sure that nothing is interfering with the bulb’s beam. Start by wiping the entire headlight lenses using a clean towel. For a finer finish you can make use of a Headlight restoration wipe to remove any oxidation or dirt residuals from the lenses. Additionally, to save the light fixture from becoming flooded with moisture, damaged lenses must be changed as soon as feasible. The reflector will become tarnished due to water, and the lamp will soon stop working due to corroded connections.
Headlight bulb diagnosis

The headlamp bulb may often be accessed from inside the bonnet of a modern automobile, however on some models, the grille or lamp bezel must be removed. The main beam or the dipped beam are typically the only two headlamps that fail. This is simple to examine in a lamp unit that has a bulb installed: remove the bulb, hold it up to the light, and look for any broken filaments. Halogen bulbs shouldn’t be touched with fingers if they are present. Keep your fingers off it with a clean, dust-free cloth to prevent early failure. If required, clean it with methylated spirit applied to a cloth.
A different approach is required to determine whether a sealed-beam unit is defective since filament damage cannot be detected. Where that type of bayonet bulb holder has been used, checks on the wiring and connections must consider the spring-loaded contacts. The lights in that unit could go out due to a stuck plunger, while a failed insulating washer could produce a short circuit, dim all the lights, or blow a fuse. A bad ground connection between the headlamp and the car’s body is typically the cause of a faint yellow light on one side. The connection is frequently just a wire lead that is fastened to the body; nevertheless, if the connection develops a high resistance due to corrosion or dirt, the light will be faint. To clean the terminal and washers, unbolt the connection and use an emery cloth. To clean the bolt, use a wire brush. The metal’s surface where the hole was drilled should be cleaned. Reassemble, then firmly tighten.
When two headlamps are connected, the identical fault may emerge on both. Rust behind the locating flange of one or both bulbs, though, is another potential reason why both lamps are dim. Wherever you discover it, remove rust and debris. Fault in the supply to the main lighting switch or between that and the dip switch indicates a failure in every headlamp, both main and dipped beams, on both sides. Check any fuses that are installed in the headlamp circuit to see if they have blown. By putting supplementary driving lamps or installing too-powerful bulbs in the main lamps, circuits can become overloaded. An unreliable voltage regulator in the charging circuit is yet another potential reason why fuses or bulbs can blow.
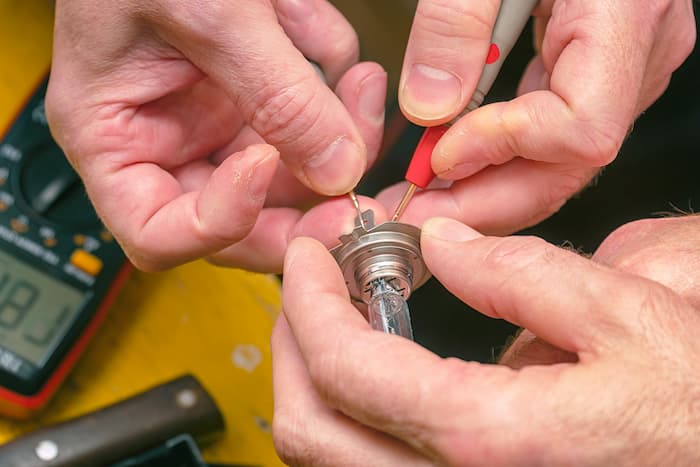
Testing headlight with a battery
- Connect the earth terminal on the battery to the earth tag on the sealed beam using a basic test lead and crocodile clips.
- The live battery terminal should be connected to the crocodile-clip end of the circuit tester. Next, touch the probe to each terminal on the sealed-beam unit in turn.
- Use the appropriate settings on your car’s headlight switch. If a sealed-beam unit has three terminals, both main and dipped beam filaments are present; if it has only two, one terminal is the earth and the other exclusively works on the main beam.
- The bulb is defective if any of the live terminals are ineffective. Check the connector block and wiring leading back to the snap connectors on the car’s main wiring loom whether they are all functional. If they aren’t, check the headlight relay.
Testing the headlight connectors
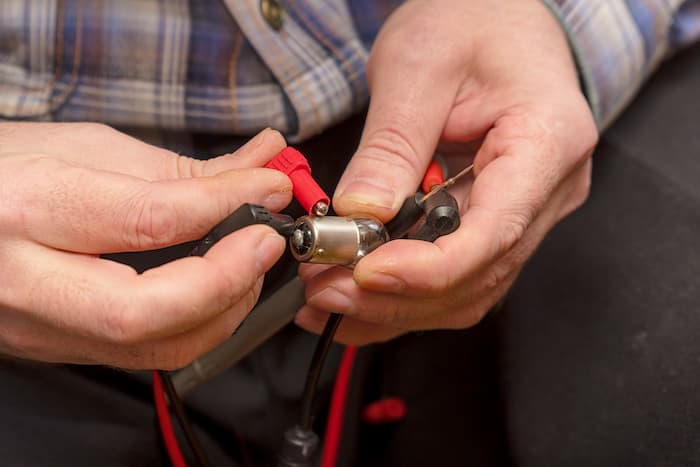
- A sizable rubber guard may be placed over the connector block located at the back of the headlight. Include the two-pin or three-pin multiple plugs to finish it off.
- Turn on the headlights. Connect a circuit tester’s earth lead to a reliable ground, such as the automobile body, then use the probe to individually inspect each connector terminal.
- The earth is one of them. The primary beam terminal, if there is only one other terminal, is it. When a connector has three terminals overall, it can accommodate both the main and dipped beam. To check each terminal, use the car’s headlight switch.
- Check the wire and the snap connections back along the wiring loom to the bulkhead if any of the positive terminals are not functional. Before reinstalling, clean all the terminals.


