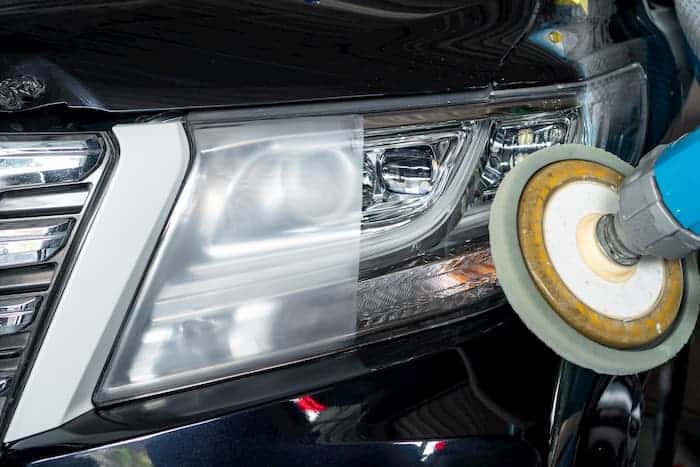
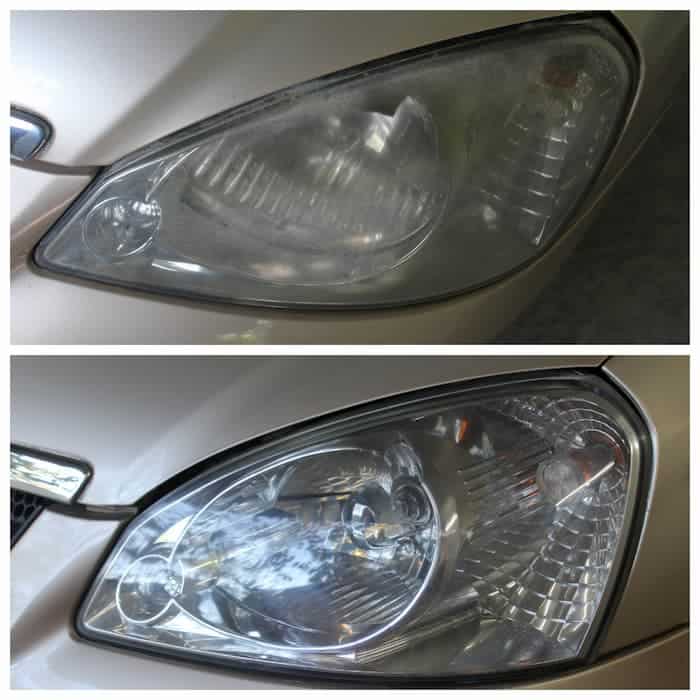
The way to polish headlights goes beyond washing a car with automotive soap and water. This is why you would mostly hear new car enthusiasts and motorists ask “how to polish headlights?” When your headlights get foggy or oxidized, they begin to have this yellowish color that makes your car look old and unattractive. Once you notice this change, then it’s time for a car headlight restoration. The importance of using a headlight lens restorer to defog oxidation cannot be overemphasized. Headlights are designed to help you see the road more clearly. It allows other motorists to spot you easily. Foggy headlights are not good or beneficial in anyways as the dim lights can affect your sight on the road, especially at night. This puts you at risk and can delay your time while driving.
Contrary to the 60s sealed glass headlamps, today’s headlights are made from polycarbonate plastic. These upgrades are more cost-effective and long-lasting but they are very rugged. What this means is that they tend to react quickly to Sun and UV rays. As soon as your headlights begin to get foggy or look cloudy, or hazy, know that the oxidation process has already begun. This is normal and shouldn’t cause any freight because car headlight restoration is easier than you think. With some home DIY methods of using headlight lens restorer, you are good to go. There are several ways and means out there to polish and defog your headlights, but below are some of the best ones that you can practice yourself.
How to get rid of foggy headlights 3 DIY ways
Because cleaning headlights may seem complicated, we have compiled some easy DIY tricks for car headlight restoration. With simple everyday tools and fluids found in your home, you can restore your headlights to its default shiny appearance. No hard and fast rule doesn’t require you to be a professional car detailer.
Here are some ways to use your everyday home tools for your car headlight restoration:
Using toothpaste:
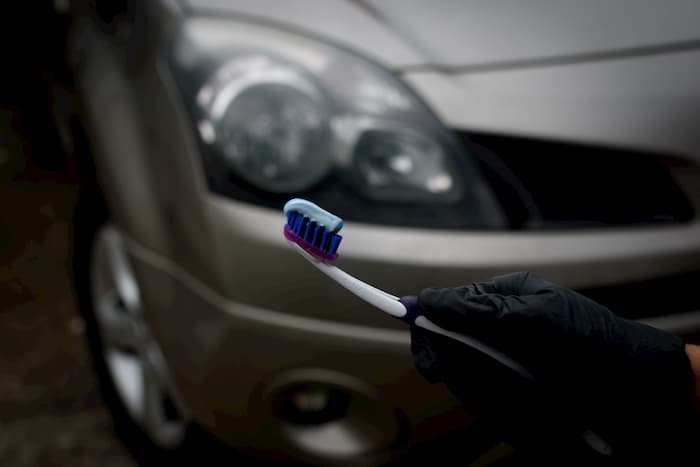
Toothpaste can come in handy in restoring your headlights and getting rid of the fog that has settled on it. However, it is to be noted that you can only do this when your headlight is only slightly foggy and not when it is seriously yellowish and colored.
To use this method, get an abrasive toothpaste and use a clean cotton towel to apply the toothpaste to the headlight lens. Do not put too much, but just a fingertip amount and rub all around the headlights. But before doing this, you must also have wet the headlights and done preliminary cleaning with automotive soap and water.
You may need to scrub a little harder for the fogginess to clear off, but ultimately, toothpaste may be the answer to your headlight problem and even turn out to be the only DIY car lens restorer you need.
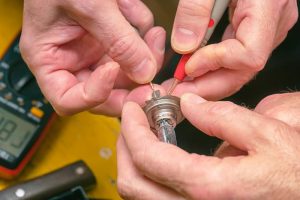
2. Using a simple DIY headlight restoration kit
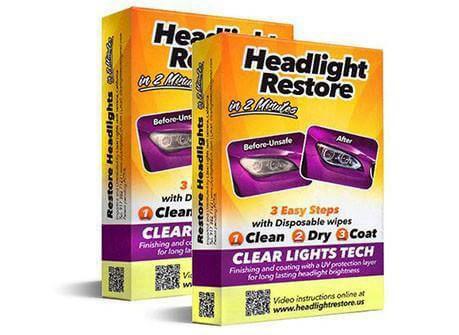
You could also use a restoration kit. Headlight restoration kits like Clear light tech comes with step by step user instructions and guidelines. This is to help you do it yourself unsupervised and with little or no help.
Here are some useful tips when you decide to use a headlight restoration kit.
- Always ensure to follow the manufacturer’s instructions to the letter, there is no need to improvise.
- Don’t rush the process, oxidation does not happen overnight, so getting read of oxidation and foggy headlight may take a few more minutes than you envisaged, don’t be hasty, be patient.
- A DIY restoration kit like clear light tech doesn’t require sanding. So, you need to wipe thoroughly as the manual suggests.
- Be very careful when applying your headlight restoration kit. Most kits require that you tape around the edges of your car headlights to avoid spoiling your car paint job.
- Always wet the headlight surface before wiping and using the kit’s solution.
- Trust the kit and the instructions and guidelines
3. Using vinegar solution
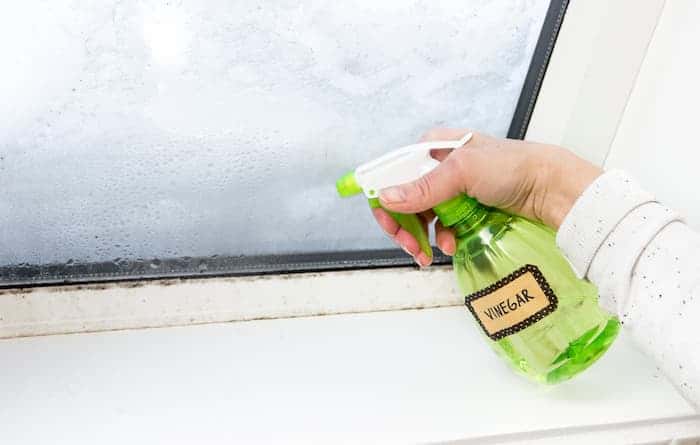
Vinegar isn’t only best used for culinary arts. It can be a great tool for quickly removing grims and discoloration from headlights. With the little vinegar sitting on your kitchen cabinet, you can be able to easily remove surface dirt by spraying and washing your headlights.
Depending on how foggy or yellowed your headlights look, you can add a little amount of baking soda to your vinegar solution to make it more potent. Furthermore, you can turn your vinegar solution into a wax protectant to reduce future fogginess from developing on your headlight lens.
- Mix vinegar with water:
To make a vinegar solution for your headlight restoration, mix at least three cups of water with a cup of distilled vinegar. Put the water and vinegar solution in an empty spray bottle for easy application. Be sure that you don’t allow the volume of the vinegar to be more than the water volume. That can cause the mixture to be too acidic that it can damage the cover of your car headlights. - Spray the vinegar solution on your headlights:
With your vinegar solution contained in a spray bottle, gently apply the solution on your Headlight lens. Make sure you spray the entire area of your Headlight cover and allow it to soak for about 5 mins. Leaving the solution to stay for some minutes before washing, allows it to melt every grim. Thus, making it possible for you to achieve a sparkling appearance. - Wipe away dirt with a microfiber towel:
Using a clean microfiber towel, gently wipe off the vinegar solution from your Headlight lens. As you clean off the solution from the headlights, every yellowish discoloration, grits, and Fogg would come off easily. If you notice any dirt remaining, you can scrub a little bit harder and can repeat the process till your desired result is revealed.
Conclusion
After removing the solution, sometimes dirt and yellowish coloring may remain on the lens and you may doubt the effectiveness of vinegar as a headlight lens restorer. Don’t fret! If your headlights are still yellow or it seems like the solution didn’t work, you may need to scrub a bit harder to get the stains out. You may need to repeat the process more times until alL the dirt and grime comes off. These simple tricks and DIY methods above would go a long way in restoring your car headlights if followed thoroughly.