Introduction
As a driver, you already know the importance of your signal bulb. It helps you indicate your direction to other road users, allowing you to prevent collisions.
No one would want to drive their cars, especially at night when it has no signal bulb. You would notice that the driver panics and looks for the nearest mechanic in such a case.
Sadly, there are some situations where you won’t be able to find a mechanic. So, what do you do?
If you know how to replace a burned signal bulb, you won’t panic as you can do it yourself.
Knowing how to replace a burned bulb is a top DIY activity, and this article will guide you on the process how to replace a burned signal bulb.
Here is how to replace a burned signal bulb:

- Find the right bulb
The first step to changing your burned signal bulb is to find a suitable replacement. Knowing which bulb fits your car is highly vital. For example, a person who drives a Mazda may not be using the same bulb as someone who drives a Toyota Corolla. So, it would be best if you got the right option.
If you do not get the right option, it will not fit in perfectly, as the old burned bulb. If you fix the wrong option, it will either not stay or fall off while driving.
Of course, you do not want this to happen. But, suppose you are a novice when it comes to car parts. So, you will need the help of an expert. You can also get recommendations from friends.

- Open the hood or trunk
In some cases, you are changing your headlight. Other times, you are helping someone out. Whatever the case might be, you need to find the location of the bulb.
Once you are sure that you have the correct bulb, you can open either the hood or the trunk. These are the areas where the signal bulb will be located in any vehicle.
Since there are various types of car lighting systems and cars, we cannot specify if it will be the hood or the trunk. So, it depends on the kind of car you are working on.

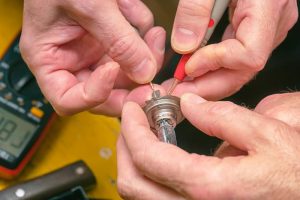
- Remove the old bulb
Once you have figured out if the burned bulb is in the hood or the trunk, the next step is to take it out. Now, this is where it gets tricky. One needs to be observant and careful when taking out a burned bulb.
There would be some screws and nuts holding the bulb together. When taking it out, you need to note the pattern as you will also use it when putting in a new bulb. Also, ensure that you do not misplace any of the screws. But if you did, here is how to replace your headlight adjustment screw.

- Put in the new bulb
After removing the old bulb, the next step is to put in the new one. If you used a clockwise method to remove the old one, you would need to go anti-clockwise during replacement. It is to ensure that the new bulb stays in place.
Then, you can go ahead to test the bulb to ensure that it is working. If it is not working, it means that you did not fix the bulb correctly, so you need to try again.
Conclusion
Now that you know how to replace a burned signal bulb, do you know how to remove oxidation using headlight restoration kits? In case you don’t, click the link to find out how. Although we hope that such a situation never gets you unaware again. But if it does, the tips above should have you covered.
So, what are you waiting for? Share this new knowledge with others!