Discovering your headlight is broken as you leave the garage can be annoying. If you must drive at night, it is even more annoying. The next step for most individuals is to have the car serviced. This is frequently the first logical action to take when a bulb is bad. It can be challenging to reach the bulb to begin with.
Additionally, correcting it may seem like a difficult undertaking. But it’s simpler than you anticipated. You can test your headlight bulbs with a multimeter and replace your headlight if necessary. You should now take the car to the mechanic to see if the car has a problem. When light bulbs cease working, the problem is frequently ma za aa aswith the bulb. That implies that you can fix it yourself without seeing a mechanic. This guide explains how to use a multimeter to test headlight connectors/bulbs.
Steps to test a headlight bulb and connector using a multimeter
It is important to note that certain vehicles include a set of spare light bulbs. They are in the trunk of your car. If your car doesn’t come with a set, you can purchase a fresh set at the shop. It is advised that you have at least one set in your car so that you can quickly replace a bad bulb. You should expect to pay anywhere from $8 to $150 for a new set of bulbs. The price will vary depending on your car’s make, model, and output socket, among other factors.
- First step: Locating the bulb
You’ll need a digital multimeter in this situation. You can complete the task without purchasing an expensive piece of equipment. The glass or plastic cover of the car needs to be taken off first. To access the bulb, use this method. Carefully unscrew the bulb from the socket after removing the cover.
- Second step: Setting up your multimeter
Take your multimeter and switch to continuity mode. Depending on the kind of gadget you have, you could potentially set it to 200 ohms. If the multimeter is appropriately set to the continuity mode, it is simple to check. Press the probes together while waiting for a beeping sound to accomplish this. It will produce the sound if the continuity mode is correctly set.
The following step is to find your base number. You must compare the statistics you obtain from the base number to the ones you obtain after testing the car lighting. This will reveal whether your bulbs are still functional.
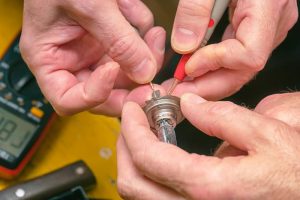
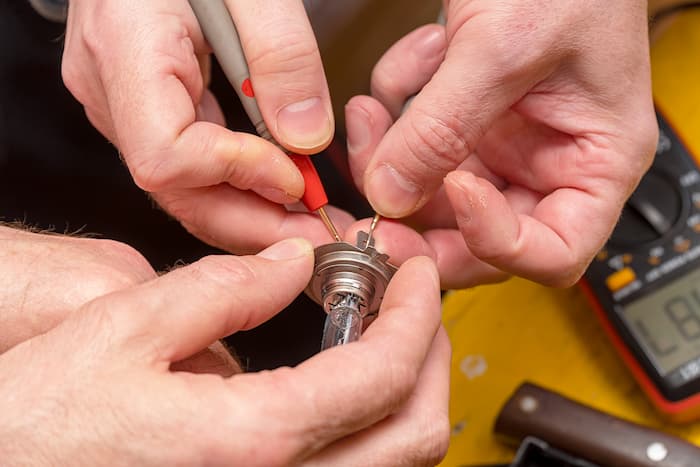
- Third step: Placing the probes
The black probe should next be placed into the bulb’s negative area. Press the red probe for a brief period against the positive pole. A beeping sound from the multimeter indicates that the bulb is operating flawlessly. If the bulb switch breaks, there would be no continuity, so there would be no sound.
The outward appearance of your bulb can also be used to determine whether it is functioning properly. It is broken if there are black streaks inside the bulb. However, if there are no signs of overloading or cracking damage, the problem may be more internal.
- Fourth step: Understanding your reading
Even though the bulb appears in fine physical condition, a defective bulb would not register any reading on a digital multimeter. This is due to the absence of a loop. If the bulb functions properly, the reading will be rather near the earlier baseline. For instance, a good bulb should fall within the range of the reading if the baseline is 02.8. It is important to note that the type of bulb your car uses will also affect the reading. For instance, if the reading is above zero, the bulb is still functional when using an incandescent bulb. If it reads zero, on the other hand, the bulb needs to be changed.
If your headlight bulb is fluorescent, a measurement between 0.5 and 1.2 ohms indicates that the bulb has continuity and should be operating. If it reads less than the minimum, on the other hand, it is defective and needs to be replaced. It is important to note that a successful reading does not necessarily indicate that the bulb is operating properly. Therefore, you should contact your mechanic to have a professional check if your light bulb isn’t operating even when the digital multimeter indicates that it’s in fine condition.
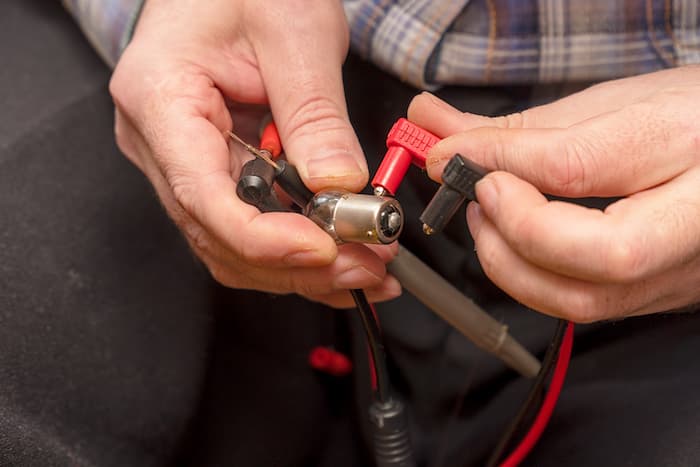
- Fifth step: Testing the connector
The connector will then be examined to determine its condition. The connector at the back of the headlight bulb must first be removed. To avoid removing the wire from the connector when removing the connector, be cautious. The connector is bi-directional. Place the probe on one of the connector’s sides. You can adjust the digital multimeter to 20VDC if you use a 12VDC base voltage. Now, enter your car and switch the headlight to see the reading.
The reading must be as close as feasible to the base voltage. If it is very low, there is a problem with the connector. The problem lies with the bulb or bulb switch if the connector is functioning properly. To rectify the problem, either replace the bulb or repair the switch.
The fact that you can apply this to other bulbs may be of interest to you. The household bulbs that aren’t working anymore can be tested. Despite any variations in the result, the concepts remain the same. Following these easy steps, you can test your headlight bulbs and address any problems. If the bulb is the problem, you can take care of it independently. Your headlight will turn on when you purchase and install a new bulb. However, if after installing a new bulb and the light emitting from it isn’t as bright as it should, you need to restore the headlight lenses using a Headlight Restoration kit.
You might also need to go to a mechanic if it is a mechanical malfunction, such as an issue with the switch, connector, or bad fuse.