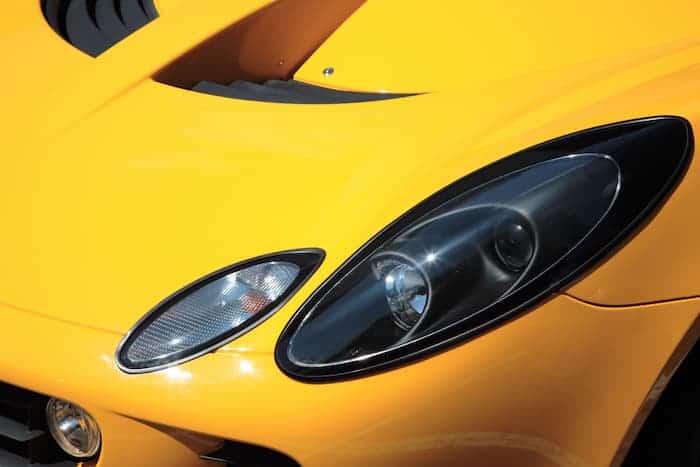
With more and more new car users emerging, the idea of having a car that stands out has become part of the new trend for motorists especially within younger people. From interior decorations, LED strip installation, and vehicle tint to car body modification, our cars can be beautified to our desired taste. With that being said, if you would like to beautify your car but don’t know where to start, let’s look at some easy ideas like tinting your car’s headlights.
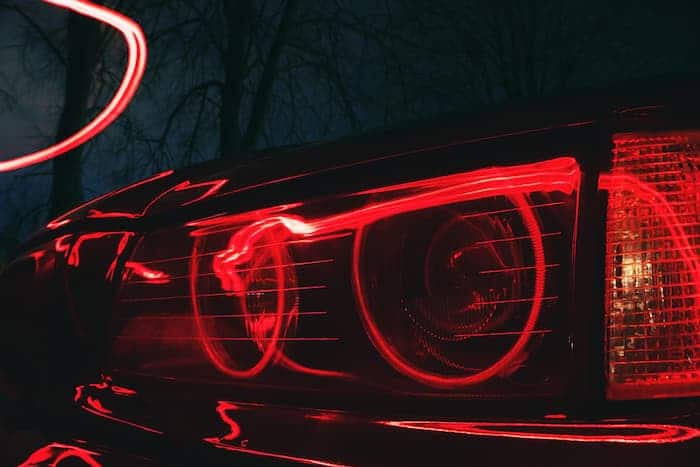
Headlight tinting is the process of applying film to a vehicle’s headlights to make them darker or a different hue. These are for you if you value originality and enjoy personalizing every aspect of your car. With a quick and easy application, headlight tints can radically transform the appearance of your car. Your lights are shielded from road debris by the film, which stops them from being scratched, chipped, or dented. They are very resistant to UV rays and warm temperatures like most tints, which keeps the lights from fading, becoming dirty, or deteriorating.
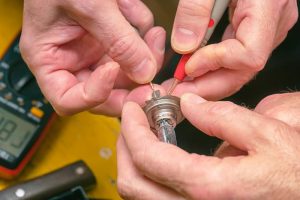
Headlight tint films come in a variety of shapes, materials, and colours. But before we get started on the installation process, here are the tools you would need to install your car’s headlight tint.
Installation tips
- A temperature range of 70° to 80° F (21° to 27° C) is ideal for application.
- Turn on your lights whenever you can to assist raise the surface temperature.
- The surfaces must be dry and clean before application.
- It is best to continually spray both sides of the film with an application fluid or mild dishwashing solution when removing pre-cut smoked tint pieces from the backing to avoid the kit adhering to itself too soon.
- With a product like Rapid Prep, thoroughly clean the affected areas.
- When it’s raining or when there is a lot of relative humidity, avoid applying.
- Avoid back and forth bending when applying vinyl film because this may cause the glue to wrinkle.
9 Steps to installing a headlight tint film
Step by step install headlight tint film
-
Step 1: Preparation and cleaning
Since the radian of the lamp differs between headlamp and taillight installation, I’ll be honest and say that it doesn’t really matter if the heat gun is used sensibly. Start by thoroughly cleaning the housing, lens, and surrounding surfaces of your headlights. Remove any dust, oil, and residues from the windows, the surrounding panels, and even the region where you’ll be tinting for proper adherence. Clean all surfaces with soap and water.
Note: Test the cleaning solution in a hidden location before use. Clean the application area with a lint-free, clean cloth. Before applying, make sure the lens is dry and that any oils or residues have been cleaned off. If masking tape adheres to the application surface, that indicates that the surface is prepared for application. If it doesn’t stick, additional cleaning with a headlight restoration wipe may be required.
-
Step 2: Spray and lubricate lenses
Spraying a generous amount of soapy water onto the light will enable you to adjust the film while it is being applied. Include the trim and gaskets around the lights as well.
-
Step 3: Take off the head- and tail-light tinting film liner
Spray the Rapid Tac on the tint and mist your fingertips as usual. Carefully and slowly raise a corner of the liner and start to peel it off to get rid of the tint. Use application soap water to mist the tint on both sides. This will give you the option of repositioning the film on the lamp and stop the tint from adhering to itself.
-
Step 4: Apply headlight tint film
Apply the moist, sticky side of the film on the lens after spraying application soap water over the light. To align the film with the edges, reposition it. If the application tabs are present in your kit, you can use them. These tabs are not a standard feature of all kits.
Note: At this point of installation, the film could seem “short” or “large.” This is because the film has not yet been heated, stretched, or trimmed.
-
Step 5: Spray headlight/taillight Tint
Reapply the soap and water solution to the film’s exterior. So, there will be less scratching. Reapply the spray to the region to enable repositioning.
-
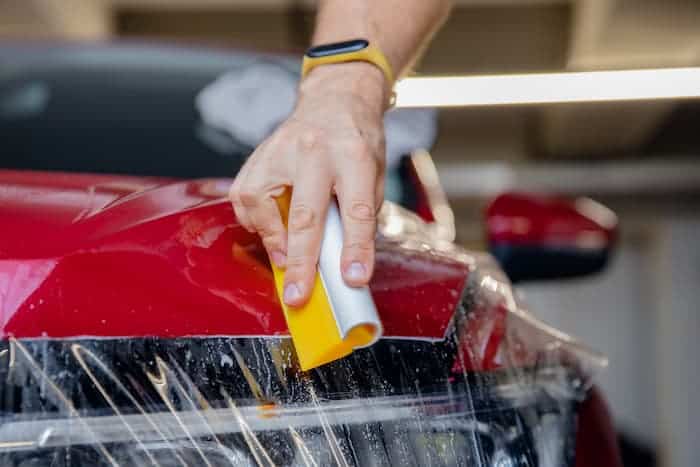
Step 6: Squeegee on headlight/taillight tints
Apply pressure to the film’s one end so that it starts to attach to the area’s one end for flat surfaces. Squeegee the film by applying pressure and sweeping it in a smooth manner. If done correctly, you should be able to see the water draining out from behind the film. Continue doing this throughout the remaining area.
-
Step 7: Heat the tint
Heat the tint with a heat gun to help the film shrink and cure.
-
Step 8: Trim away excess
Trim any extra vinyl that may protrude from the edges.
-
Step 9: Let the mixture dry and pop any bubbles
After at least 30 minutes of drying, thoroughly wipe off any excess solution. If the film’s underside has not been completely dried out, some fogginess may develop. This is entirely typical. Because the film is permeable and breathable, any cloudiness or fog will dissipate within a few days to a few weeks. Depending on the film’s thickness and exposure to heat or sunlight. During this curing process, any surface texture, scuffs, or ripples will also vanish.
Note: Adhesion could be challenging in cold or humid climates or if the surface wasn’t thoroughly cleaned before use. If there are still any tiny bubbles after 24 hours, you can proceed to puncture them with a fine needle. After popping them, push any remaining liquids or air out using a squeegee. At this moment, DON’T spray any more application fluid.
Tools:
- Heat gun or hair dryer
- Rapid clear
- Squeegee
- Razor blades
Materials: soap water
Important notes for installation
Peel up the film to the area where there are noticeable bubbles, then reapply it. Vinyl film Headlight/Taillight is particularly forgiving when the region and the film’s adhesive side are both moist. If you want to withdraw and reapply the film several times before heating it, you can do so by keeping it damp. Spray the outside of the film with a solution once more for headlight tint kits with slits. So, there will be less scratching. Again, spray the light. Apply the solution liberally on both sides of the film as you would above. One of the pieces or flaps of the film will inevitably cross the other when it is stretched into place. The flap should be slightly smoothed till flat. Gently score the overlapping film with a razor until you can remove the extra film with ease.
Spray the outside of the film with a solution once more if the light has a lot of curves, which are most lights on the market right now. So, there will be less scratching. Again, spray the light. Use a squeegee to apply pressure to the centre of the light’s film so that it starts to cling to one end of the light. It could be simpler to have a partner assist you by holding the film as you carry out the following action. Use a hair dryer or heat gun on a low setting to slowly start warming the film from one end away from the middle. You don’t want to melt the film, so take your time heating it. Apply the remaining film by working your way outward and toward the edge of the light in a spiral or circular manner. By continuously heating the film, you can get it to stretch and conform up to 2% to 5%. Unless the kit features slits that are meant to be overlapped and cut-away, this is the only technique to impart colour to a curved light.