Headlights get cloudy over time and can become dangerously dim if you don’t restore it with a headlight restoration kit. It is a legal requirement to keep your headlights in a good working condition. The two main ways that headlights degrade over time are dimming bulbs and discolored headlight casing. Foggy headlights and dimming beams can affect even the most diligent drivers. If your headlights aren’t working properly, it might be as a result of the following cases.
- Burned-Out Bulb
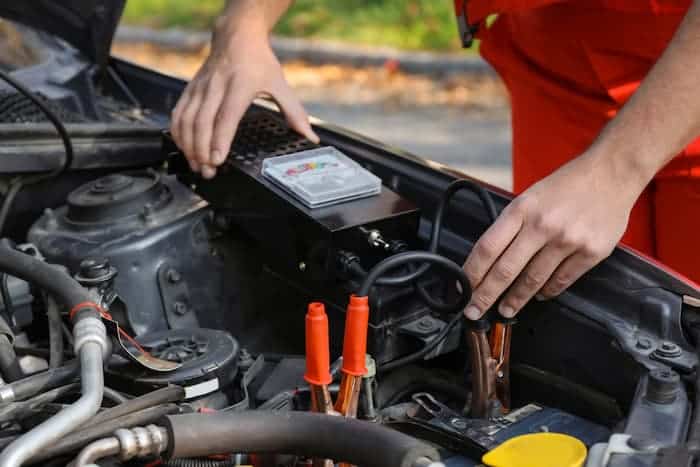
- Corroded Socket
- Blown-Out Fuse
- Electrical Short
- Electrical Open
- Charging System Problems
Most times, all you need to do is either replace a light bulb, check a socket or test the circuit and switches to confirm whether current is flowing or not. Though some of these tasks may look complicated, you will be dealing with simple issues most of the time. Your most difficult task will probably be getting access to components, depending on the particular model. But if you are a DIY kind of person, you can check out our previous article on how to change car headlights.
Notwithstanding, to avoid chasing false leads and make a successful repair, you need to know when to replace your headlights, where to start, and the potential causes you may be dealing with. This guide will show you the causes behind most of the common headlight failures and some practical techniques that will help you 1to diagnose and repair your headlights faster.
Headlight issues and ways to fix them

One of the headlamps doesn’t work:
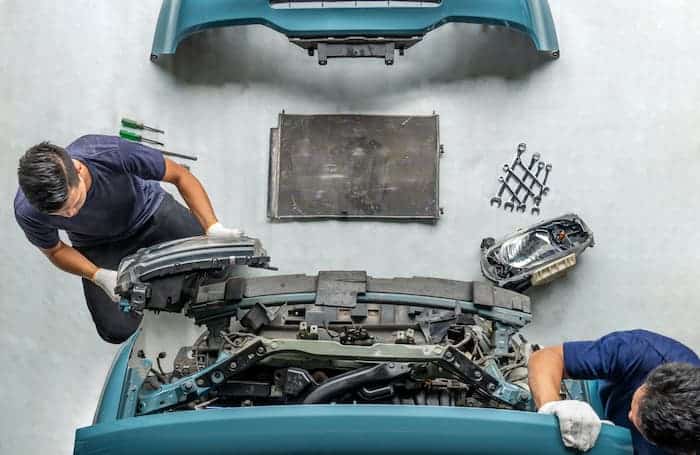
When one of your headlamps doesn’t work; whether it is the high or low beam, the first thing to do is to check the lamp or bulb itself. Having access to the headlamp or bulb for inspection or replacement is not difficult. To get you started, follow the steps below.
- Step one: Removing the headlamp
Older car models use a sealed-beam headlamp, mostly secured by a bezel and a retaining ring with a few screws. Check around the perimeter of the headlamp and remove the screws that hold the lamp in place. If need be, access the electrical connector from the rear of the assembly.
- Step two: Removing a halogen bulb
Most modern cars use composite headlights, i.e. a halogen bulb right inside the headlamp housing. You can access this bulb through the rear of the light assembly. To do this, apply the steps below:
- Pop the hood open.
- Locate the rear of the headlight lamp you want to change.
- Unplug the bulb’s electrical connector by;
- Push and screw the base of the connector about a quarter of a turn anticlockwise.
- Carefully pull the socket out of it housing or
- Unscrew the ring that is holding the connector in place about a quarter of a turn anticlockwise.
- Remove the ring and pull the socket out of its housing.
Always consult your vehicle repair manual to prevent damage to the assembly, if need be. While inspecting the bulb, look at the filaments inside. If the bulb is bad, its filament(s) will be broken into halves.
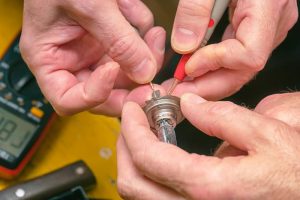
- Step three: Checking for continuity
You check for continuity if you are not certain if the filament is broken;
- Adjust your digital voltmeter (DMM) to the lowest setting on the Resistance scale.
- Turn-on your DMM and strike the meter probes on both sides of the bulb contacts.
Your meter will beep or show zero resistance if there is continuity and if otherwise; the display will show infinite resistance, overload or no sound, depending on the meter configuration.
My headlights flickers:
Flickering headlights isn’t really common but can also become a problem. It may be caused by:
- Bad headlamp switch
- Strange resistance in the circuit
- Loose or corroded connection
- Poor circuit grounding
- Bad multifunction switch
Firstly, check if both headlamps are flickering or just one. If only one of the lamps is flickering, focus on that part of the circuit:
- Check the power and ground wires that link to the headlamp.
- Check the electrical connector.
- Check the bulb socket for a loose wire or corrosion on the connector.
If both headlamps are flickering, check the section of the circuit that controls both lamps:
- Adjust the switch between low and high-beam to see if the lights flicker in both modes.
- Check the switch.
- Check for loose wires in the switch.
- Check the multifunction switch.
- Check the power side of the circuit for a loose wire.
My headlights are dim:
Several faults like bad connections, worn-out bulbs or even damaged wires in the circuit may cause headlights to be dim. You may notice that headlights dim in different engine operating conditions. If the headlights are dim when the engine is off or while idling:
- Confirm that the battery terminals are clean and tight.
- Ensure that your battery is charged and is in good condition.
- Check charging system output and drive belt for proper operation.
- Inspect the light bulbs for proper installation or wear.
If headlights dim when the engine speed is above Idle:
- Check the charging system output and ensure the drive belt is operating properly.
- Check for voltage drop in the circuit.
- Check the light bulbs.
My headlights don’t work:

In some common cases, none of the headlights may work in either mode. Always ensure that the circuit fuse(s) is good and connected properly. Also, if both of your headlights aren’t working; check the light bulbs and ensure they are in good condition and not burned out. Different electrical faults like; blown fuse, no power to the circuit, failed switch, bad multifunction switch and bad dimmer switch can keep the headlights from working.
Finding an open in the circuit:
An “open” in the circuit can stop one or both headlamps from working. The open may be caused by a disconnected wire, a loose electrical connection, a failed switch/relay or even corrosion in a connector.
Step one: Check the fuse:
- With a test light, check for power coming into the circuit fuse(s). If there’s no power, check the panel connections and the condition of the wire and connections between the panel and the battery. Should the problem be as a result of a bad headlight relay, read our DIY fixes for bad headlight relay.
- Check for power on the output side of the fuse. If there is no power, check the fuse and the panel connections.
Step two: Check the light socket:
- Ensure power is entering the socket.
- Ensure you have a good ground at the socket as well.
- If power is not reaching the socket but there is power from the fuse panel into the circuit, check the circuit between those two points. Also check power going to the switch and relay, depending on your particular model and if need be, consult your car repair manual to gain access to components.
Step Three: Check the headlight switch:
- Ensure that power is reaching the switch.
- Ensure that power is flowing from the switch to the circuit.
- If power is not flowing to the headlight switch, check the wire between the switch and the fuse panel.
- If there’s no power flowing from the switch to the rest of the circuit, check for a drop in voltage at the switch and if the voltage drop is high, change the switch.
My headlamp fuse keeps blowing:
It can be tricky at times trying to find the source of an electrical short in a circuit. A short happens when a power wire or hot wire (the wire carrying current to the loads in the circuit) finds a short path to a grounded surface. Most times, the short may cause the circuit fuse to blow or one or more light bulbs to burn out.
A short in circuit happens when;
- When the insulation of a hot wire breaks and the wire touches the body metal.
- When two parts of a hot wire becomes pinched, cutting through the insulation and making ground.
- When a hot wire disconnects from the component and hangs loose, touching the ground.
- When a hot surface melts the hot wire’s insulation thereby allowing the bare wire to touch a grounded surface.
Common ways to locate short circuits are;
- Connect a test light across the blown fuse. If the test light comes up, there is a short in the circuit.
- Disconnect the light socket, switch and relay; one at a time.
- When the test light stops coming up, you have found the part of the circuit where the short circuit is located.
You can save on headlights repairs by fixing your headlights much faster at home using a few simple tools and these simple strategies described in this guide.