When it rains, your lights get cracked and dripping with water. To access the headlight housing, you must remove many pieces because they are sectioned off. To replace headlight assemblies, it is not uncommon for a vehicle to have panels or other components removed. To access the headlights on some automobiles, you may need to remove the front bumper. These processes take time, even though they may be relatively simple.
When headlights age, they become dimmer and dimmer, but the process is so gradual that it frequently goes unnoticed. The most straightforward technique to change or upgrade your headlights only functions if the lenses are cloudy. Using a headlight restoration kit or a few materials from your neighborhood hardware shop, you can eliminate this foggy appearance, typically built-up oxidation that can impact your headlights’ brightness and beam pattern. Your headlights suffer damage from time, occurrences, and the environment. You’ll need to replace your headlight when;
- Cracked Headlights: Headlights damaged in an accident may develop cracks that reduce the light they produce, making night-time driving challenging.
- Foggy Headlights: If you park outside, the sun’s UV rays will batter your vehicle all day. The acrylic headlights deteriorate and turn somewhat yellow over time as these harmful rays strike them.
- Scratched and Nicked Headlights: Although headlights are made with a harsh topcoat, this coating gradually wears off when the headlights are battered by tiny rocks, road salt, and other debris that flies around when you drive down the highway. When you go at night, nicks and scratches cause the lenses to become obscured and make it more difficult to see.
- Broken Waterproof Seal: Headlights have a waterproof seal to keep moisture out. If this seal fails, moisture may collect inside the lens and become difficult to remove by wiping. In addition, water droplets reflect light from the bulb, making it harder to see at night.
Your headlights must either be fixed or replaced if there is anything wrong with how they operate. You can determine whether your headlights need to be replaced by looking at the exterior housing and evaluating how well they illuminate the road at night. Then, start by taking a quick walk around the vehicle.
- Visually Examine the Headlights
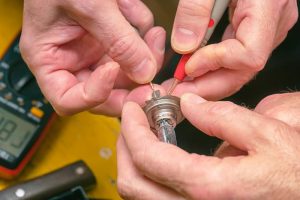
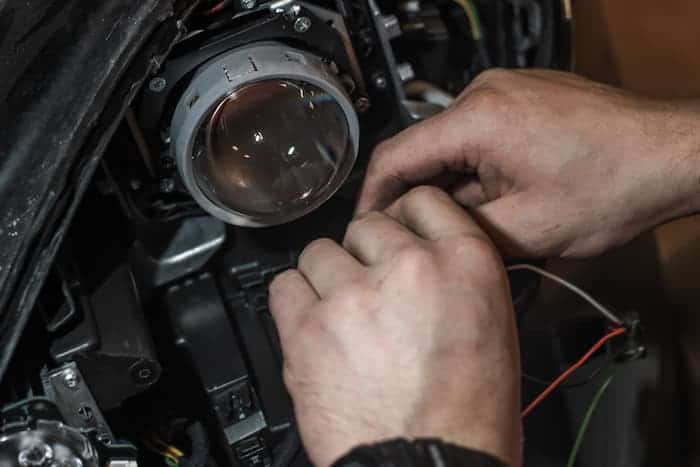
Without turning on any lights inside or outside your car, start by looking closely at your headlights to see if there is any evident damage. Examine the condition of the headlights’ front side if you can’t spot any cracks in the headlight assembly. Headlights often haze with time. Additionally, water can enter the housing and cause the bulb to burn out. The headlights shouldn’t be fogged up with moisture or covered in haze. In that scenario, you ought to remove the headlight housing and conduct a more thorough inspection.
- Examine How Effectively Your Headlights Illuminate the Road at Night
It would be simple to evaluate whether both headlights produce light while driving at night if you only had one working headlight. You might be able to notice cracks in the bulb cover from the inside, but it would require a different kind of inspection. To ensure that you can safely drive at night, the entire housing assembly will need to be changed if your headlight lenses sustain any damage following an accident or because of road debris.
Your headlights might require a thorough cleaning if they don’t appear to provide light. Some cars have built-in washers and wipers that can clean the headlights on their own. If the lights work correctly, the headlight assembly could be resolved by cleaning the headlight assembly. Before washing your headlights, I would advise checking to see whether they are damaged.
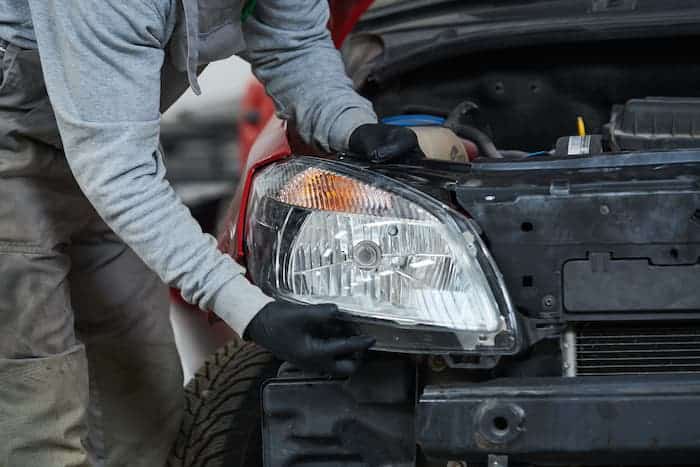
The best way to remove your headlight assembly
Whether you’re using LED headlights or regular halogen car lights, there are a few crucial situations in which replacement is advised or required. Halogen bulbs should be replaced every two to three years, but headlight housings may also need to be changed. Typical headlamp assemblies are made of clear, durable plastic and impact resistant. The translucent plastic is vulnerable to heat and UV deterioration, though. As a result, clear plastic headlight lenses start to corrode with time, turning yellow and murky in appearance. This oxidation can lessen the efficiency of headlights and turn signal lights by obscuring the beams and changing how the light spreads through the oxidized lenses. If ignored, this problem gets worse over time. The aftermarket offers a variety of headlamp restoration products. While some of these items can effectively remove fogged headlight lenses, most of them are at best transient. This plastic oxidizes because of a chemical breakdown that can’t be stopped. So even if oxidation can be removed, it will always come back until it is sealed in some way. Often, replacing the car’s stock headlamps is the best course of action when oxidation is present.
Maintaining your car’s standard headlights keeps you safe and secure, and what better way to do that than to either restore your car’s headlight using a headlight restoration kit, replace your headlight housing, or change your headlight bulbs?
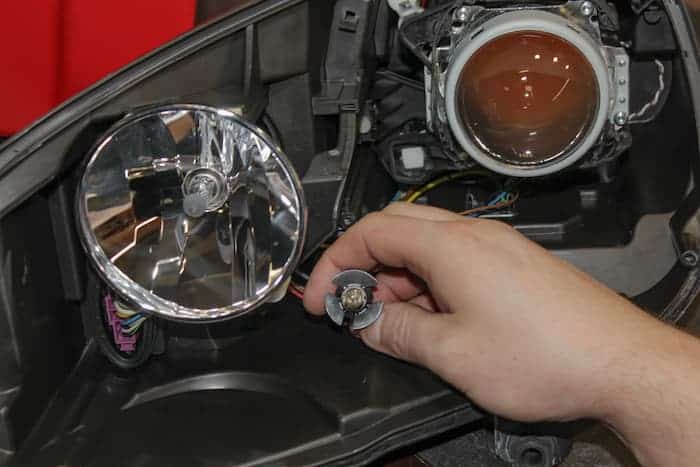
It can be scary to replace the headlight components in many modern cars, but it’s frequently easier than it sounds. Although the procedure may alter slightly for different makes and models, the standard designs incorporate a system of clips and brackets that secure the assemblies while allowing for relatively simple maintenance. Care must be given to keep the pins and frames when removing the headlamp because they can be a little more challenging to find. Typically, press fit clips or prongs that hold the unit in from the sides hold headlight assemblies in place from the sides with 1 to 3 screws from the top, directly underneath the hood. It is significantly less common for sports cars or vehicles with complex front grille geometry to need the bumper or grille removed to reach retaining screws. The process is reversed when a headlight needs to be replaced, and special care must be taken to transfer screw clips, bulbs, and fittings into the new headlamp before installation.