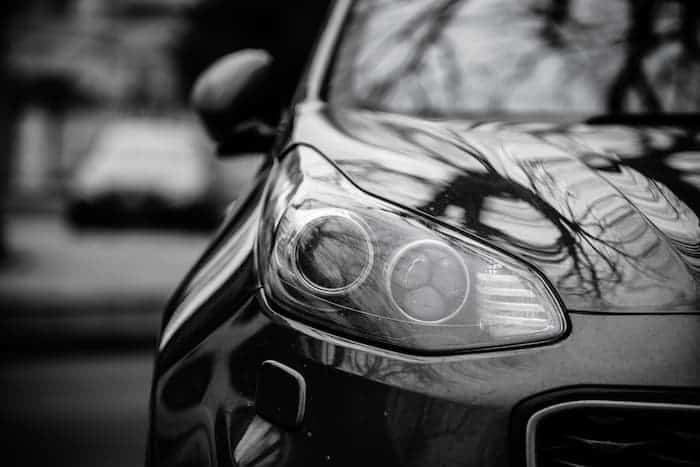
With the continuous release of new automobile models and fast cars, one would come to term that truly, we have come far from the stock vehicles of the 90s. This advancement also marked an evolution in the vehicle’s lighting system as the need for a better headlight cannot be overemphasized>. Headlights don’t only help illuminate the road better but also helps to prevent most accidents and road crashes that happen at night.
But then, a better lighting system means newer car models and not everyone can afford a new car with a projector or laser beam. For this reason, car lightning manufacturers also came up with the development of convertible headlights that can fit right into older cars but produce the same beam effect as the latest cars. With this development, motorists can customize their old cars for example; change from manual switch headlights to automatic headlights.
So, if you have thought about the impact of installing an advanced headlight system and you would like to convert your land rover discovery 2 headlights read on and get started on your own. This guide is compiled based on detailed hands-on experiences from Auto experts in carrying out the Disco 2 headlight conversion. Despite how simplified we’ve laid out the process, we recommend you consult your auto mechanic should you have any difficulty.
NB:
- Disconnect your car battery before you begin a DIY that involves electrical work.
- Get all the necessary parts for the DIY conversion before you start so you don’t have to start and stop in between.
- Lastly, don’t leave your keys in your car before you start to avoid accidentally locking the key with the key inside.
To get started on converting your land rover discovery 2 headlights, below are the tools you need.
One: Parts
- Wire connectors: 15amp positive and negative spade type of cable connectors perhaps 30 to 40 of each.
- Electrical tapes.
- A complete set of rubber grommets.
- Piggyback style connectors for use with the spade connectors.
- Ring connectors.
- Accessory relay of 20 amp capacity.
- One length of wire.
- Molded in-curve Land Rover plastic finishing strips.
- Finishing paint for headlamps.
- A complete set of bolts and screws.
Two: Tools
- Screwdrivers and pliers
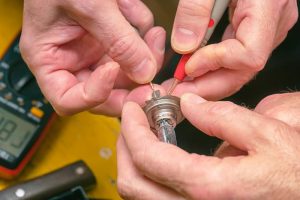
- Wire stripper or crimper for spade connections.
- Voltage text meters.
- A set of steel drill bits.
- Saw for cutting metals.
Three: The process
Unscrewing and removing the old headlights
- Step One: Unscrew the Finishing Strip
The first step to converting your Land Rover Discovery 2 headlights is to remove the old headlight housing including the finishing strip, the light indicators, and the front grille. In order for you to do that easily, you need to follow your car manual for the procedure as each vehicle model is different. However, you shouldn’t forget to label each part for reference purposes when trying to put the parts together.
In a situation where you can’t find your own manual, you can start by removing the finishing strip just below your car light. This strip is held in place by crosshead screws and you need to remove them first by accessing the wheel arch. The crosshead screws are attached to the finishing strip and retained to a metal through a hole that’s in the front of the wingtip of the car.
- Step two: Remove the front grille and deflectors
The next step would be to remove the front gr3ille and that can be done by unscrewing the screws on top of the grille. After that, pull out the plastic retainers and lift the grille to find the plastic prongs which are situated along the edge that’s fixed into holes on the car body. Once that’s completed, move on to removing the plastic deflector by drilling out the rivets. Remove the electric leveling motor of the headlamp after that and turn the body of the motor till the prongs align with the cuts out. That helps you to remove the motor easily.
With all the old parts of the Disco 2 headlights gone, it’s time to fix the new conversion headlights and you will need all your focus here to get it right. As earlier stated, ensure you’ve labeled all the parts you have removed and have taken pictures to be sure of their positions on your car. You can start the conversion in two methods. You can fit a metal disc for cutting to an angle of the panel and cut or you can get rid of the panel through the spot welds by drilling it out. While the former might leave a bit of a mess, the latter would ensure clean work.
NB: To access the base of the panel welds you must have to remove the bumper. The base of the panel acts as a mount station for the headlight washer and should remain intact for the headlight washer to work after the conversion.
Mounting the new disco 2 conversion headlights
- Step One: Create a fitting space in the panel
For the new conversion headlights to fit in properly, space must be created on the top part of the front panel to house the new shape of the headlight. Also, while creating a cut, it’s best you weld a protective metal brace at the headlight’s back to sustain the strength of the panel. Once the welding is completed you can then try out the fitting of the headlights. If it fits, you can then go ahead to reposition the cables and connectors at the back and ensure you protect every exposed metal against rusting with paints.
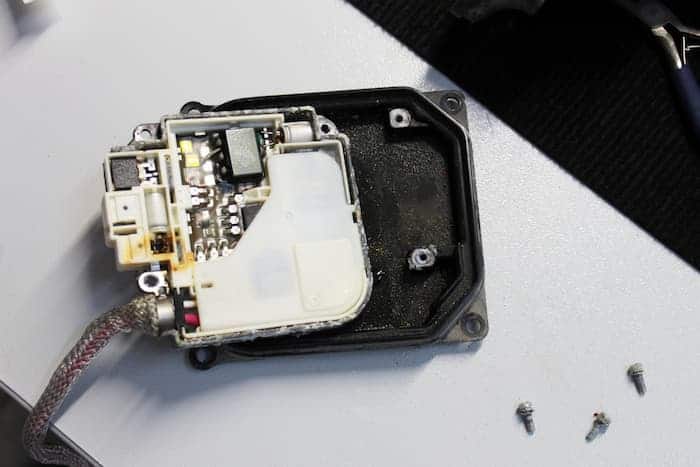
- Stew Two: Wiring the New Lights
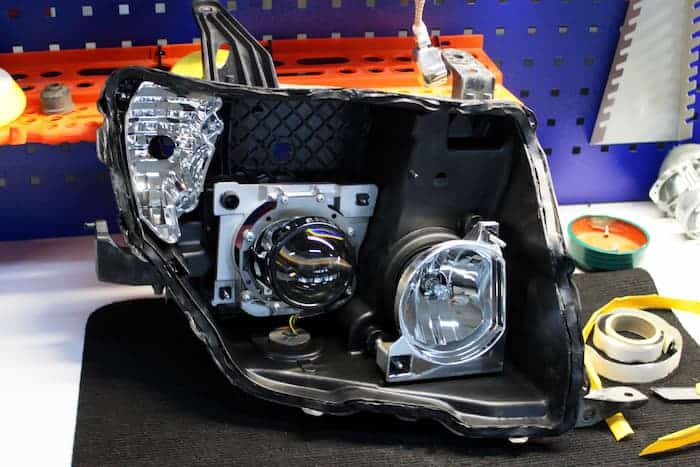
As soon as you are sure the new headlights fit, you can comfortably remove the 9 pin socket connector at the back of the headlight as it wouldn’t be necessary. It’s easy to be removed and you can do it by gently turning the connector until the socket drops into the light compartment. Pull out the wires of the connector and cut. Then, you can make a drill at the side of the headlight housing and pass the wire cables through there. Now, fix a rubber grommet around the drilled hole and seal it off using electrical tapes.
Once the headlight is in place, position the light housing downwards to ensure that the back sockets get close to the drilled mounting holes. Connect each of the 9 wires from the back of the headlight to a male-type spade connector. Attached back the finishing strip to the new headlight and reconnect both the green and white wires for the headlight leveling system and then, reinstall the metal connector clip so that it can withstand the wind when driving.
Step Three: Reconnect Existing Wires to the New Headlight
The old headlights of the Land Rover Discovery 2 have two filaments and are wired in such a way that there is but a single switch for both the high beam and the low beam while the new conversion headlights are produced in a way that there are separate switches for all the lights.
In addition to the advancement of the new Discovery 2 headlights, the style of the indicator is different. While the old indicator hosing featured a sidelight marker, the new one doesn’t. So, the plug for the side marker should be covered with electrical tape and set aside.
Since the lights are separate and operated using different switches, it’s only wise to create different earth points for each headlight beam, unlike the old headlight which required just one earth point. Do this by drilling and use a bolt and washer to hold the ring connectors in place.
Next would be to locate old the navigator connector plug, side light connector plug, and headlight connector plug and ensure they are close enough to the new plus for better fitting. You can cut off and tape the earth wire of the indicator plug as it wouldn’t be needed.
Step Four: The Finishing
Finalizing the Installation of the New Headlights
With all wires and relays successfully connected, test the lights and move on to tidying the installation. Here, you can start by ensuring all cables and new wires are safely clipped away from your car’s body as shown or directed in your user manual. Once you have checked those, ensure the headlights are well aligned and are fitted perfectly into the front wing recess. To make sure your headlights are aligned correctly, check our guide on how to align your car headlights. Make sure you follow the pictures you took of each part and their label strictly to be sure every part was installed correctly. For the mounts, its best to use large washers and self-tapping bolts. Although there are some adjustment screws available behind the front grille for the lower mounts, a washer is still required for a better grip. Finally, fix the front grille and get rid of the old headlight mounting points on both sides of the grille with a hacksaw. Once you are done, refit the top securing screws and enjoy your new Disco two headlights. However, as with any headlights, there is a future chance of oxidation which would result in the yellowing or haziness of your car’s plastic headlights. While oxidation is unavoidable due to the name of headlights, it can be best tackled with the use of advanced headlight restoration kits or restoration wipes.